Accuracy is one of the most important characteristics of 3D printers, especially SLA 3D printers, which are known for their high accuracy; if an SLA 3D printer cannot print models with high accuracy, it means that it cannot handle even the most basic tasks. And it’s not easy to achieve high precision printing. Many small factors can add up that will affect the printing results and make the finished product very far from the prototype.
Before we begin, let’s quickly and accurately spell out our accuracy and distinguish it from the related concept of resolution. In the midst of 3D printing, accuracy describes the variance of a part from its intended shape. For example, a print can be scanned and found to have an average dimensional deviation of 0.050 mm (the physical difference from the original model) and a maximum deviation of 0.15 mm. This is different from resolution, which describes the level of detail that a printer can theoretically generate based on its specifications. High resolution does not always translate into high accuracy, and the numbers are often misleading. It is not uncommon for high-resolution machines to produce parts with low accuracy. That’s why experienced manufacturers value accuracy far more than resolution, especially where detail is important. Let’s take a closer look at the top 10 reasons why SLA 3D printing is inaccurate.

1.Mechanical control
Probably the biggest determinant of accuracy is the level of mechanical control of the printer, referring to the accuracy of movement of multiple mechanical controls, including the vibrating mirror and table. If these cannot move exactly as directed by the software, then deviations will occur. From the user’s point of view, there is nothing the user can do to change this; the accuracy of movement depends on the quality of the printer components and how well the parts are assembled. Desktop printers perform poorly in this area because they do not have the quality of high-end industrial-grade printers. Low-cost industrial-grade printers also usually save money by using cheap parts. Low-grade parts not only reduce the mechanical control performance of the printer in the first place, but also are constantly aging over time.

The specific characteristics of printing inaccuracies depend on the part that is causing the problem. For example, the source of error in the Z-axis is different from that in the X- and Y-axes, which are usually caused by problems with the scanning head (which directs the beam to the specific location of the print layer). The accuracy of the Z-axis depends primarily on the table moving downward layer by layer (or upward in the case of desktop printers). The movement of the table is controlled by a long screw, which must move just far enough to allow the platform to move one layer precisely in height, typically 0.1 mm. small problems with the quality of the screw forming can be reflected in the printed part, often resulting in a rough surface. It is also critical that the table be kept absolutely level at all times. The slightest tilt can adversely affect accuracy or even lead to tilting of the entire workpiece.
2.Print Deformation
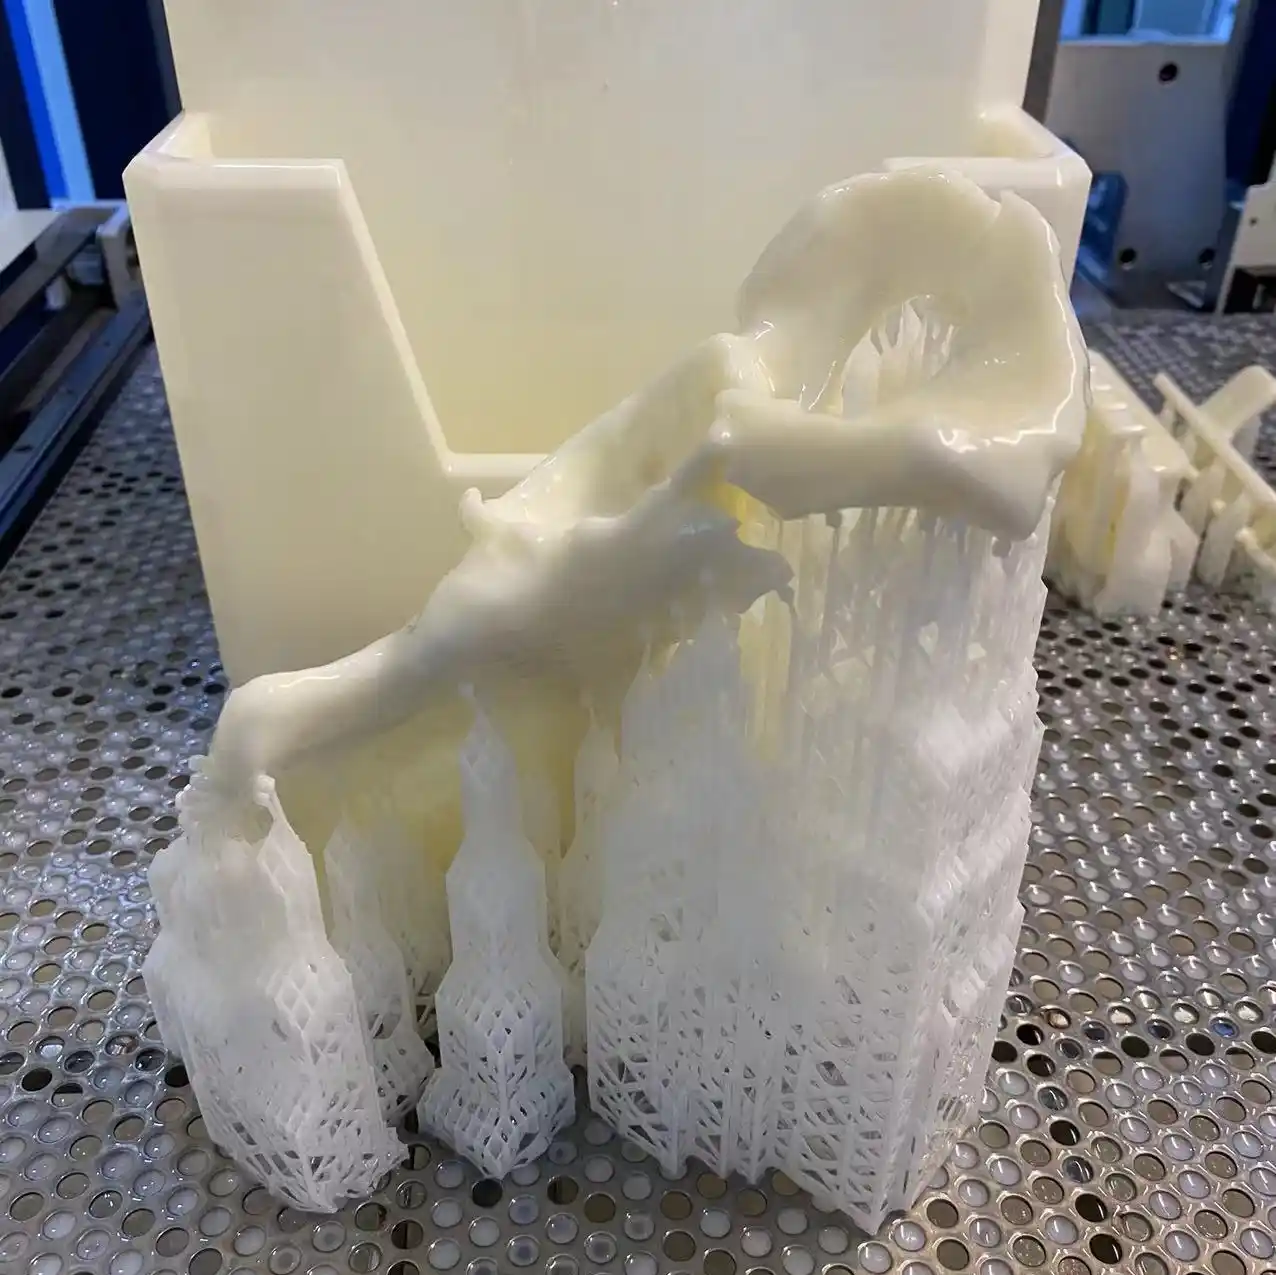
Because SLA printers use resin materials rather than molten thermoplastics, the shrinkage and distortion effect of the material when printing is much less than with FDM printing technology. But that doesn’t mean that SLA doesn’t have distortion issues. 3D printing with resin usually results in some degree of overhang. Although exposure to the laser allows the resin to cure, it cannot be fully cured in a flash. The resin material will only reach its maximum strength when it is placed in the UV curing oven during the post-processing phase. This is not to say that the material is weak or uncured prior to post-treatment, only that the material has not yet reached its maximum load-bearing state. Well-supported parts of the workpiece do not have this problem, but long, thin parts of the workpiece that are unsupported will have overhang. This type of overhang is usually very small, but because it occurs at each layer, the overhang accumulates and significant dimensional deviations occur. Overhang is also influenced by the resin used. Some tougher materials do not have this problem, but softer materials are particularly prone to it. So in SLA printing, the support material is very important, and if the software does not position the support optimally, then accuracy can be seriously affected.

3.Computer modeling
Even if the printer’s mechanical controls and materials are perfect, the printed part will not be 100% accurate. STL modeling uses a limited number of triangles to build the shape of the part. This approach has no problem in reproducing flat surfaces, but it cannot reproduce curved surfaces perfectly. The reason for using a very large number of sharp triangles is to better reproduce the surface, but at the microscopic level it is actually not smooth. The more triangles you use to reproduce the details better, the more the file size and processing time becomes a problem. Modern techniques and software are better at solving such problems, but the SLA computing power of the past was very limited in this regard.

4. Orientation
As discussed in this article “Desktop vs. Industrial Printers”, print orientation is very important. Most desktop SLA machines print parts in reverse, meaning that most of the part is hanging during the molding process. Adding additional support material can mitigate some of the overhang, but there will still be some material overhang due to gravity. But print orientation is only one important factor; the orientation of the part in the forming chamber also needs to be taken into account. The first thing to deal with is overexposure. The light shines from the laser and passes through the current print layer while partially curing the next layer of resin. This is more serious when using transparent or translucent materials. Since some colors absorb UV light better, printing with blue, green or yellow materials can alleviate this problem compared to using other colors, such as red or gray. This laser-related problem can be solved to some extent by methodically placing the workpiece in the molding chamber so that the laser beam does not penetrate the uncured resin material as frequently. In addition to UV light penetration, there is also a problem with the light bending around the workpiece during printing. This problem causes UV light to reach resin materials that should not be cured, resulting in overexposure. It is extremely complex to calculate the optimal orientation of the part to minimize this problem, but this step cannot be ignored to achieve the highest accuracy.

5. Layer thickness
Generally speaking, the smaller the layer thickness, the better, because a smaller layer thickness results in higher resolution. However, this is not necessarily the case after a certain threshold is exceeded. Some studies show that for layer thicknesses less than 0.1mm, the smaller the layer thickness, the lower the accuracy. There are several factors involved. For most workpieces, layer thicknesses less than 0.1mm do not provide a real advantage in terms of detail, but simply increase the number of layers. More layers require more mechanical movement, and the deviation of movement increases as a result. Also, thin printed layers are more likely to bend and distort, and longer molding times mean longer times before the part is fully cured in the UV oven. These factors have a small effect on accuracy, but can explain why parts printed at a layer thickness of 0.05mm are sometimes less accurate than those printed at a layer thickness of 0.1mm. Even so, printing at layer thicknesses significantly higher than 0.1mm certainly makes the part more inaccurate, producing a noticeable step phenomenon.

6. Spot Diameter
As you might expect, the smaller the spot, the higher the level of detail. The larger the spot, the shorter the print time, but it will affect the detail and accuracy of the part. It used to be simple to weigh these points, but now with the Westin SLA printer, it is possible to offer more than one beam size for the same molding. The printer can be configured with two spot sizes, one large and one small. The larger spot is used to print parts where detail is less important to speed up the printing process, and the smaller spot is used to print parts such as edges or curved surfaces. This allows for at least some balance between the two. Without this feature, printing accuracy will inevitably be sacrificed to some extent. Also, it is important to choose the right diameter spot for each molding, regardless of whether the device supports variable spot sizes. Determining the optimum spot diameter for the part requires experience and a complete understanding of the technology. Wrong parameter settings will definitely have a negative impact on accuracy.

7. Temperature and Environment
In industrial grade 3D printing, controlling the environment is paramount. As mentioned above, bending and draping problems can occur in SLA printing, and temperature and humidity can exacerbate both of these problems. Any fluctuation in temperature or humidity during the printing process can affect the print results. Resins are extremely sensitive to their environment and 3D printing requires the lowest possible resin viscosity. The higher the temperature, the lower the resin viscosity, so it is critical to keep the resin warm (constant temperature). However, the temperature of the resin should not be too high, otherwise it will make the part too soft and unstable. The optimal temperature is mainly set according to the material properties, and any deviation will affect the shape of the workpiece.
It is also crucial that the resin surface remains level. If there is a vibration or very slight movement of the machine, the accuracy will be seriously affected.

8. Scan Pitch
Scan spacing refers to the distance between the centers of two light spots. The light beam is not constantly moving, but rather illuminates a specific number of spots at specific intervals and along a route. Usually there is some degree of overlap between these spots, otherwise the interval between each cured area is very large. The scan spacing determines the degree of overlap, which has a significant impact on accuracy and speed. If the scan spacing is narrow, then there will be less uncured resin at the edges and a smoother surface. Since each scan takes longer, this of course results in longer print times. On the other hand, if the scan pitch is wide, the printing speed is faster, but it leads to rough edges of the part and consumes a lot of sanding work.
9. Scanning speed
Scanning speed is another key parameter that affects accuracy. As you might expect, faster scanning speeds decrease print accuracy, but print time is reduced. When the scan speed is set to very high, however, the effect on accuracy is usually very severe. But slower scan speeds don’t always result in higher accuracy. When the scan speed is set too low, it can lead to over-curing because the beam stays irradiated at each spot for too long. Setting the right scan speed for each molding requires a combination of experience and complex calculations.
10. Post-treatment
After the workpiece is printed, a series of post-processing steps are required, including cleaning with alcohol, removing support material and sanding. These tasks are usually done manually, so inevitably human error may occur. Due to the nature of SLA printing, the edges of freshly printed workpieces usually have a certain degree of bulge (refer to points 6 and 8). As a result, SLA-printed parts need to be sanded and polished, and sometimes the sanding is very rough. In an industry where people measure deviations in microns, it is inevitable that workers scraping the workpiece with rough sandpaper will cause a degree of unpredictability and accuracy impact. The exact amount of force applied during operation cannot be standardized, nor can the length of time. Calipers are used to measure the area to be sanded, but this process is still not accurate, especially when compared to the highly controlled movement of the printer itself.

Post-processing also affects accuracy by removing the support material. The supports need to be manually ripped or pried off with a tool, which usually leaves marks. These marks can be removed by grinding, but as mentioned above, they can affect accuracy. It is best to have experienced staff perform this step, as sharp tools can easily scratch or damage the part, or leave unwanted marks. To reduce these risks, it is ideal to use as little support as possible while ensuring that the part is secure.
Carefully remove supports after cleaning the printed part in anhydrous ethanol at a concentration higher than 99%, a post-processing process that can also have an impact on accuracy