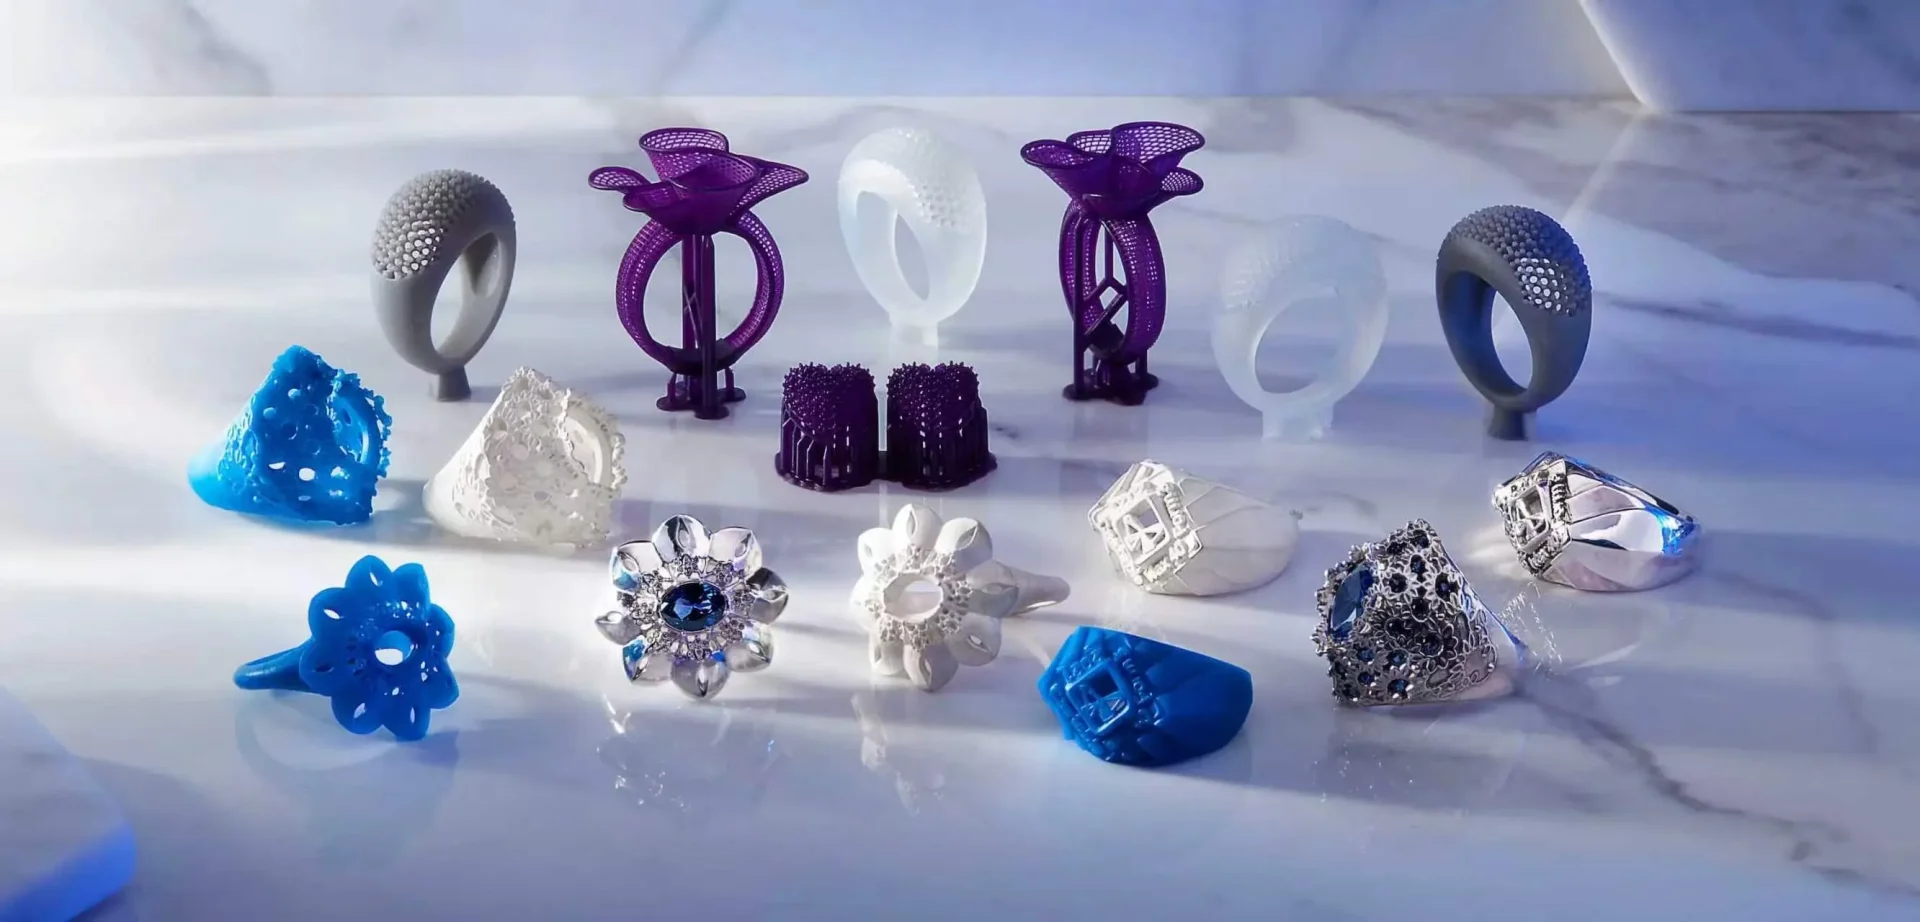
Lost-wax casting has been the backbone of fine jewelry manufacturing for thousands of years. The fundamental process—create a pattern, encase it in investment, burn out the pattern, and pour molten metal—remains unchanged. What has changed is how the pattern is made.
Today, jewelers combine traditional lost-wax casting with 3D printing to achieve detail, precision, and efficiency that hand-carving cannot match. This guide walks through the complete lost-wax casting workflow, with a focus on how castable resin patterns from SLA and DLP 3D printers are transforming the process.
Whether you are a studio jeweler producing one-of-a-kind pieces or a manufacturer scaling production, understanding each stage—and where 3D printing fits—will help you achieve cleaner castings and faster turnaround.
What Is Lost-Wax Casting?
Lost-wax casting, also called investment casting, is a process for producing metal parts from a sacrificial pattern.
The pattern—traditionally carved from wax—is embedded in a refractory material called investment. Once the investment hardens, the pattern is removed through heat or chemical means, leaving a cavity. Molten metal is then poured into the cavity, filling the exact shape of the original pattern .
The name “lost-wax” comes from the fact that the wax pattern is destroyed—lost—during the process.
Why Jewelers Still Use Lost-Wax Casting
Lost-wax casting remains dominant in jewelry manufacturing for several reasons:
Detail reproduction: The process captures fine surface details, textures, and engravings with high fidelity
Material versatility: Works with gold, platinum, palladium, silver, and their alloys
Complex geometry: Undercuts, hollow forms, and intricate filigree can be cast in one piece
Scalability: From one-off custom pieces to production runs, the same process applies
The investment casting market continues to grow, with hybrid and 3D-printed pattern methods expanding the range of geometries that can be produced at competitive cost.
The Complete Lost-Wax Casting Workflow
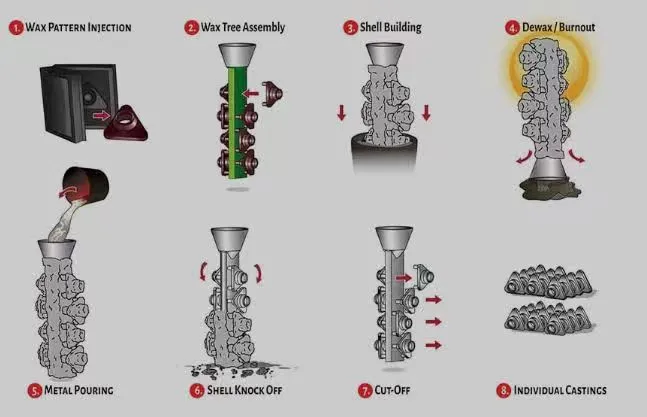
The lost-wax casting process consists of six linked stages. Each stage affects the quality of the final casting, and errors in early stages cannot be corrected later.
Stage 1: Pattern Creation
The pattern is a sacrificial replica of the final piece. It must reproduce every detail, be dimensionally accurate, and burn out cleanly without leaving residue.
Traditional method: Hand-carved wax or wax injected into a rubber mold .
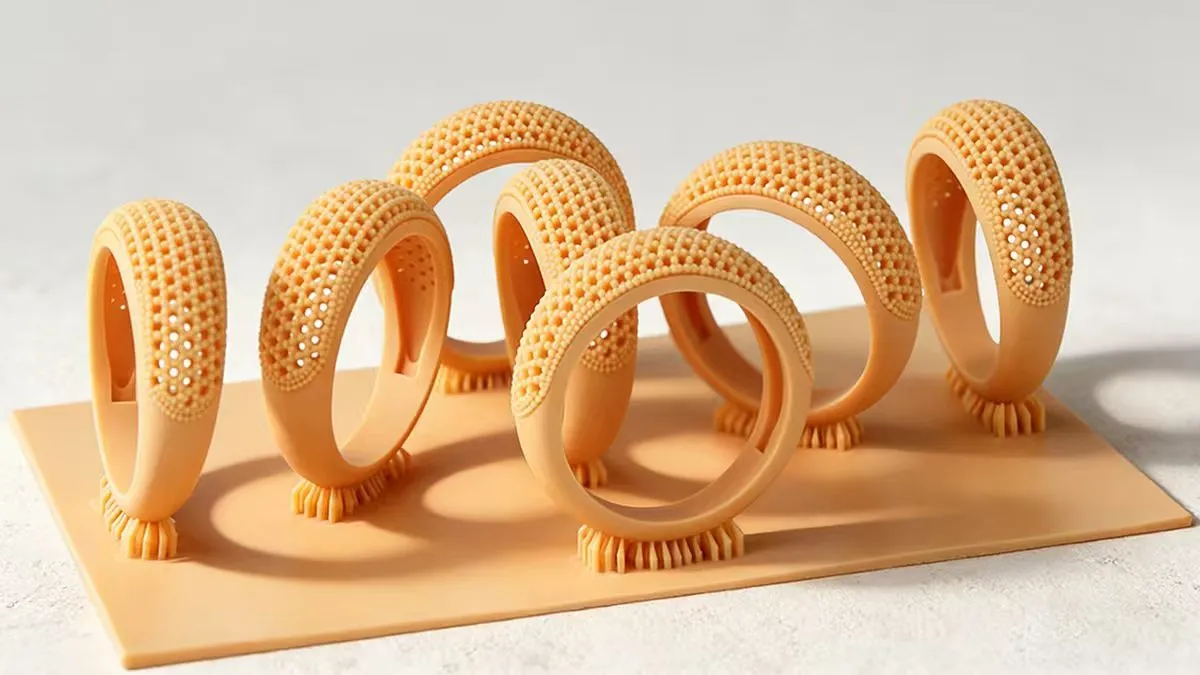
3D printing method: Castable resin printed on SLA or DLP 3D printers. This approach eliminates the need for rubber molds, enables design freedom without tooling, and allows digital design to move directly to production.
Stage 2: Pattern Cleaning and Preparation
After printing, the pattern must be cleaned to remove uncured resin. Incomplete cleaning leaves residue that increases ash content during burnout, leading to surface defects in the final casting .
Wash the pattern thoroughly in isopropyl alcohol (IPA) using two separate baths. The first bath removes the majority of uncured resin; the second provides a final rinse. A minimum of 10 minutes total wash time is recommended for castable resins.
Stage 3: Support Removal and Finishing
Supports are necessary during printing but must be removed before investment. Support marks can transfer to the final casting, so careful placement and removal are critical.
Place supports on non-visible surfaces whenever possible. For rings, place supports on the inside of the band or the bottom of the setting. For pendants, place supports on the back or bail area .
After removal, clean up support marks with fine sandpaper (600 to 1000 grit) or a dental-type rotary tool.
Stage 4: Investment (Shell Building)
The cleaned pattern is attached to a wax sprue—the channel through which molten metal will flow. The pattern and sprue are then encased in investment, a refractory material typically made from silica or gypsum-based compounds.
Investment is poured as a slurry and allowed to harden. The investment must be strong enough to withstand the casting pressure and porous enough to allow gases to escape during burnout and casting.
Modern investment casting has seen process improvements in silica-sol chemistry, with organically enhanced composite variants extending slurry shelf life beyond 60 days and reducing surface defect rates.
Stage 5: Burnout (Pattern Removal)
This is where 3D-printed castable resins differ most significantly from traditional wax.
Traditional wax melts and drains from the mold at relatively low temperatures (around 80-100°C) before significant decomposition begins . The mold cavity is empty before the temperature rises further.
Castable resin does not melt and drain. Instead, it decomposes in place through thermal degradation. The polymer chains break down into smaller molecules that must be vaporized and expelled from the mold through its porous structure.
Standard castable resin burnout schedule:
| Stage | Temperature | Ramp Time | Hold Time | Purpose |
| 1 | Room temp to 150°C | 2 hours | 2 hours | Moisture and volatile removal |
| 2 | 150°C to 370°C | 2 hours | 3 hours | Polymer decomposition |
| 3 | 370°C to 730°C | 2 hours | 2 hours | Final carbon burnout |
| 4 | 730°C to casting temp | 30 minutes | 1 hour | Flask temperature stabilization |
This schedule totals approximately 14-15 hours, significantly longer than the 6-8 hour schedule for traditional wax .
The extended hold at intermediate temperatures is critical. If the temperature ramps too quickly, the resin surface can form a char layer that traps decomposition gases, leading to porosity and surface defects in the final casting.
Stage 6: Casting
Once burnout is complete, the mold is maintained at a temperature appropriate for the metal being cast (typically 700-1000°F for jewelry alloys) .
Molten metal is poured into the sprue and flows into the cavity. Vacuum or centrifugal force is often used to ensure complete filling of fine details .
After the metal solidifies and cools, the investment is broken away, and the casting is retrieved. The sprue is cut off, and the piece undergoes finishing—filing, sanding, polishing, and stone setting.
3D Printing Castable Patterns: SLA vs DLP
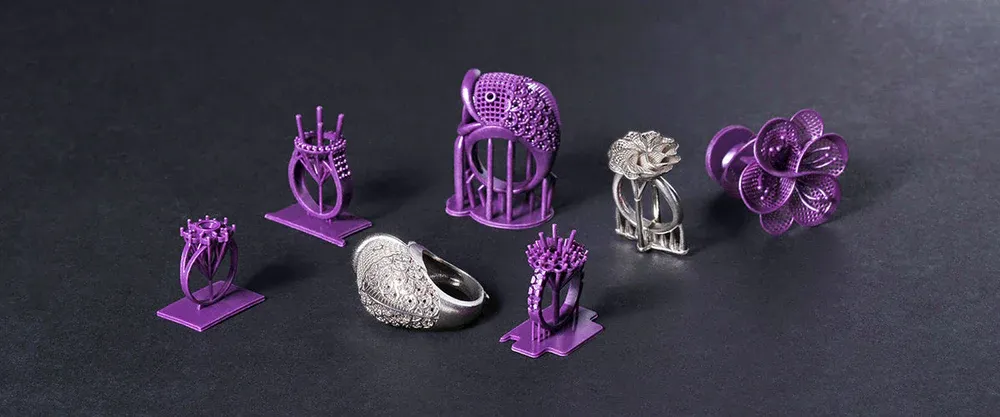
When it comes to producing castable patterns via 3D printing, two resin technologies dominate: SLA and DLP. Both use photopolymer resins, but the light delivery method differs.
SLA for Jewelry Casting Patterns
SLA uses a laser to trace each layer point by point. The laser spot size is typically 85-140 microns, and the technology excels at capturing fine details and smooth surfaces.
Advantages for jewelry:
Highest detail resolution for intricate designs
Smooth surface finish reduces post-processing
Compatible with castable resins designed for clean burnout
SLA is often the go-to for jewelry casting patterns that require maximum detail, particularly for pieces with fine engravings or filigree.
DLP for Jewelry Casting Patterns
DLP uses a digital projector to flash an entire layer at once. The projector contains a digital micromirror device (DMD) that directs UV light onto the resin surface.
Advantages for jewelry:
Faster printing for batch production
Good detail resolution (4K projectors achieve 50-100 micron XY precision)
Lower cost per part at volume
For jewelry studios producing multiple patterns per build, DLP offers efficiency advantages.
Choosing Between SLA and DLP for Casting Patterns
| Consideration | SLA | DLP |
| Detail resolution | Highest | Very good |
| Surface finish | Excellent | Very good |
| Print speed | Slower (point by point) | Faster (full layer) |
| Batch production | Moderate | Excellent |
| Cost per part | Higher | Lower at volume |
| Best for | One-of-a-kind, intricate designs | Production runs, multiple patterns |
Zongheng3D offers both SLA and DLP printer options suitable for jewelry casting. The SLA series provides ±0.1mm accuracy for complex geometries, while DLP models like the DM200 and DM300 deliver 4K resolution with batch production efficiency.
Castable Resin Selection
Not all photopolymer resins are suitable for lost-wax casting. The resin must burn out cleanly, leaving minimal ash residue.
Removal Routes: Burnout, Melt-and-Flow, and Water Dissolution
Castable resins differ in how the pattern is removed from the investment :
Thermal burnout: The pattern decomposes at high temperature. This is the traditional route and requires a full burnout cycle.
Heat melt-and-flow: The pattern softens and flows out at lower temperatures, similar to wax. This reduces thermal stress on the investment.
Water dissolution: The pattern dissolves in water or alkaline solution, eliminating the thermal removal stage entirely.
The removal route is fixed at resin selection. Burnout, melt-and-flow, and water dissolution are not interchangeable—the workflow requirement determines the grade.
Key Resin Properties for Casting
| Property | Why It Matters |
| Ash content | Low ash = cleaner cavity = better surface finish |
| Thermal expansion | Matches investment to prevent shell cracking |
| Detail reproduction | Captures fine features without loss |
| Green strength | Withstands handling before investment |
Zongheng3D offers specialty resins optimized for jewelry casting, with castable formulations designed for clean burnout and high detail reproduction.
Design Considerations for 3D-Printed Casting Patterns
Minimum Feature Size
Research on SLS-printed jewelry patterns found that the minimum reproducible hole diameter was 1.2 mm, with shrinkage of 12% at a 1.6 mm hole . For castable resin printing, minimum embossed detail thickness of 0.15 mm is recommended for better quality and durability.
Shrinkage Compensation
All casting processes involve shrinkage—both from the pattern material and the metal. Design your digital model with shrinkage compensation built in. For castable resin patterns, consult the resin manufacturer’s shrinkage data and adjust accordingly.
Support Placement
Support marks transfer to the casting. Place supports on non-visible surfaces. For rings, use the inside of the band. For pendants, use the back. Use the minimum support contact point size your printer and resin can handle reliably—typically 0.3 to 0.5 mm for jewelry applications.
Orientation
Orient castable models to minimize large flat surfaces parallel to the build plate, as these are prone to suction forces that can cause delamination in brittle castable material. For rings, a 30 to 45 degree angle relative to the build plate is generally optimal.
Frequently Asked Questions
Can any 3D printer produce castable patterns?
No. The printer must be compatible with castable resins, and the resin must be designed for the specific removal route (burnout, melt-and-flow, or water dissolution). SLA and DLP printers are the most common choices for jewelry casting patterns.
How long does the burnout cycle take for 3D-printed patterns?
A typical castable resin burnout schedule takes 14-15 hours, compared to 6-8 hours for traditional wax. The extended schedule is necessary to allow complete polymer decomposition without trapping gases.
What is the minimum detail size for castable resin printing?
Minimum embossed detail thickness of 0.15 mm is recommended for reliable reproduction. For holes, minimum diameter varies by material and printer but is typically around 1.0-1.2 mm.
Can 3D-printed patterns match hand-carved wax quality?
Yes, for many applications. SLA and DLP printing capture fine details with high fidelity. The main differences are in burnout behavior (resin decomposes rather than melts) and the need for optimized thermal schedules.
What metals can be cast using 3D-printed patterns?
Gold, platinum, palladium, silver, and their alloys are all suitable for lost-wax casting with 3D-printed patterns . The burnout schedule should be adjusted based on the metal’s casting temperature.
Is 3D printing cost-effective for jewelry casting patterns?
For one-of-a-kind pieces and small batches, 3D printing eliminates the need for rubber molds, reducing setup costs and lead times. For high-volume production, traditional molding may be more economical, but 3D printing remains valuable for design iteration and custom work.
Conclusion
Lost-wax casting remains the foundation of fine jewelry manufacturing. The addition of 3D printing to the workflow—specifically SLA and DLP castable resin patterns—has expanded what jewelers can design, how fast they can iterate, and what level of detail they can achieve.
The key to success lies in understanding the differences between traditional wax and castable resin, particularly in the burnout stage. With the right printer, the right resin, and an optimized thermal schedule, 3D-printed patterns produce castings that rival hand-carved wax in quality—with the added benefits of digital precision and design freedom.