The Need for Speed (and Quality) in Prototyping & Production
You’ve got a brilliant design, a tight deadline, and the pressure is mounting. Whether it’s a critical prototype needed for investor validation, functional parts for end-of-line testing, or a small batch of custom components to fulfill an urgent order, the clock is ticking. In today’s fast-paced world of innovation and manufacturing, getting physical parts in hand quickly isn’t just a convenience—it’s often a necessity for staying competitive.
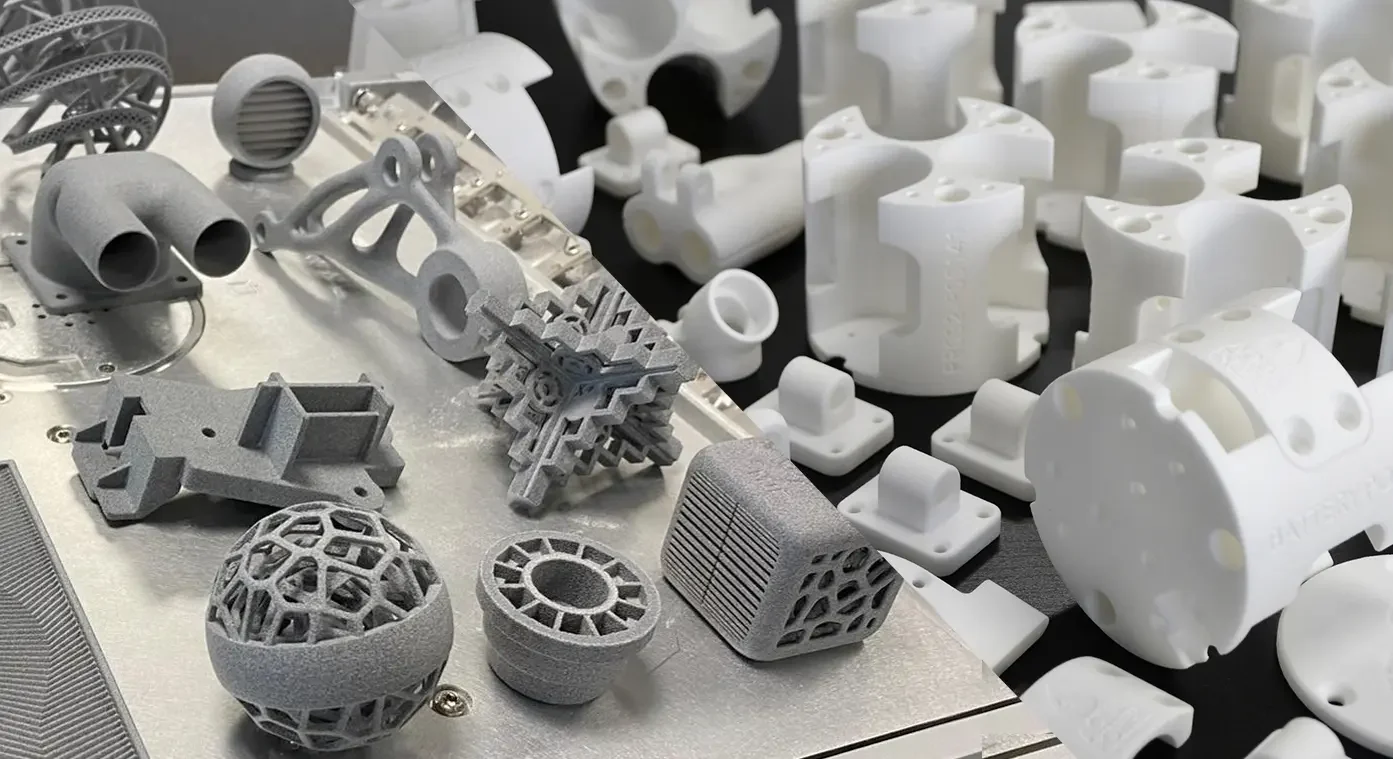
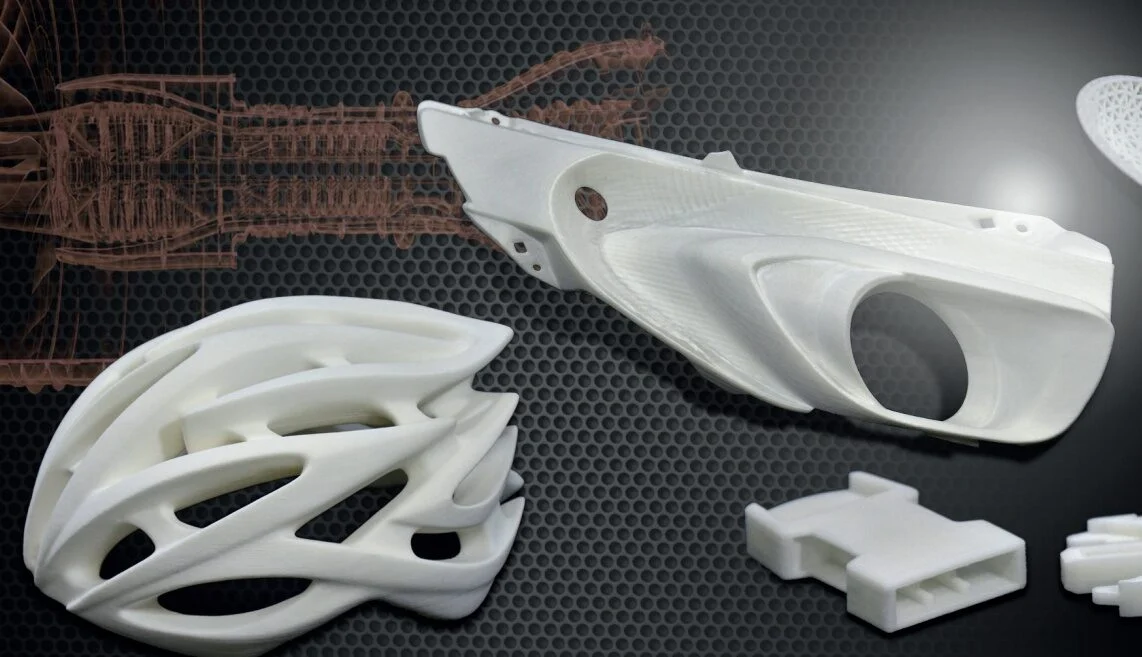
Enter Selective Laser Sintering (SLS) 3D printing. This powerful additive manufacturing technology has become a go-to solution for engineers, designers, and manufacturers worldwide. Why? Because it produces strong, durable parts with complex geometries, often rivaling injection-molded quality, without the need for cumbersome support structures. From tough nylon prototypes to flexible TPU components, SLS delivers functional parts ready for demanding applications.
But amidst the excitement of rapid prototyping and on-demand production lies a crucial, practical question: If you order parts from an SLS 3D printing service today, how long will it actually take to get them?
Understanding the turnaround time for SLS services is more than just satisfying curiosity; it’s fundamental to effective project management. It impacts your planning schedules, influences your budget (especially if considering expedited options), and ultimately determines your ability to meet critical deadlines. Getting this wrong can lead to delays, frustration, and missed opportunities.
Unpacking the Powder Keg: A Deep Dive into SLS 3D Printing
Ever wonder how those incredibly intricate, yet remarkably strong, 3D printed parts are made – the ones that look almost like magic, with complex internal channels and no obvious layer lines or support marks? Chances are, you’re looking at the result of Selective Laser Sintering, or SLS. While desktop FDM printers melting plastic filament are common, SLS operates in a different league, using powdered materials and lasers to build robust, functional components.
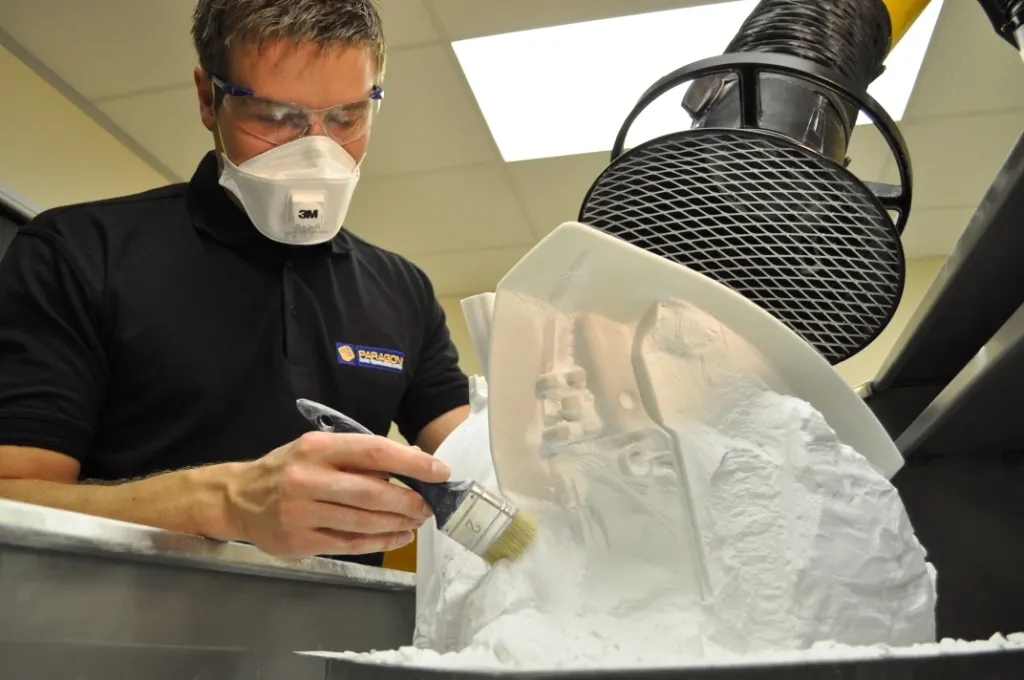
So, let’s pull back the curtain and explore this fascinating technology. What exactly is SLS, and why is it such a powerhouse in the world of additive manufacturing?
The Magic Behind the Method: How SLS Works
Imagine a build chamber, essentially a box, filled with a fine polymer powder (think something like powdered sugar, but engineered plastic). The process unfolds layer by meticulous layer:
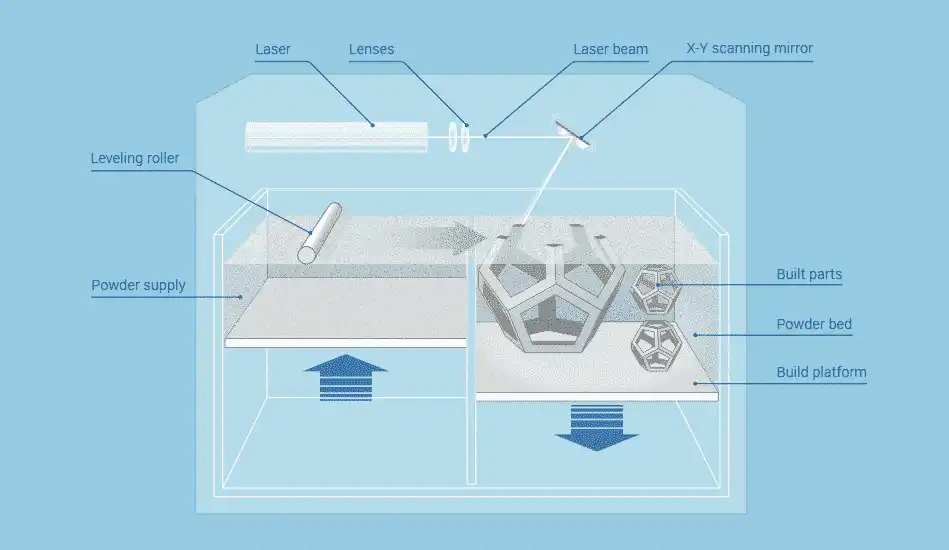
- Pre-Heating: The entire powder bed is heated to just below the polymer’s melting point. This is crucial – it means the laser only needs to add a tiny bit more energy to fuse the powder, making the process faster and reducing warping.
- Powder Deposition: A roller or blade sweeps a thin, fresh layer of powder (typically around 0.1mm thick) across the build platform.
- Laser Sintering: Here’s where the magic happens! A powerful CO2 laser, guided by a computer scanning system interpreting your 3D model (usually an STL file), selectively draws the cross-section of your part onto the powder bed. Wherever the laser hits, it applies just enough energy to sinter the powder particles – fusing them together into a solid layer without fully melting them.
- Platform Lowers: The build platform lowers by the thickness of one layer.
- Repeat: The roller deposits a new layer of powder, the laser sinters the next cross-section, and the process repeats hundreds or thousands of times until the parts are fully formed, encased within the surrounding unsintered powder.
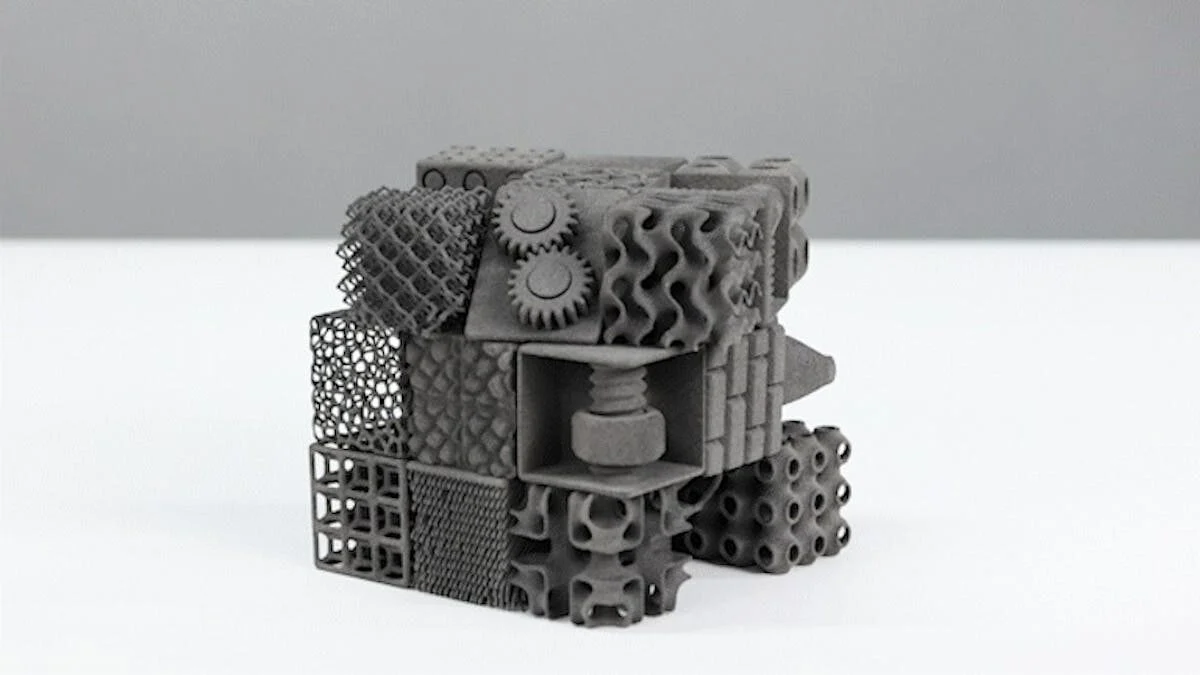
One of the biggest advantages you’ll notice immediately? The unsintered powder acts as its own support structure! This means SLS can create incredibly complex geometries, undercuts, and internal features without the need for dedicated support structures that need to be manually removed later (a common requirement in FDM or SLA printing). This unlocks tremendous design freedom.
The Building Blocks: Common SLS Materials
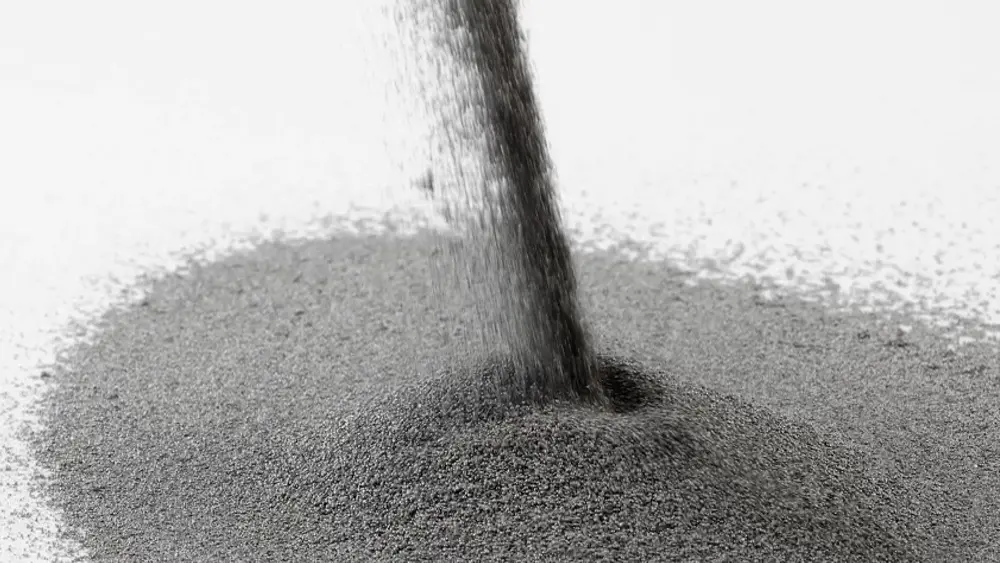
SLS isn’t limited to just one type of powder. While Nylon is the undisputed king, several materials cater to different needs:
| Material | Key Characteristics | Common Uses |
| PA 12 (Nylon) | Strong, stiff, good chemical resistance, durable, versatile | Functional prototypes, end-use parts, housings |
| PA 11 (Nylon) | More flexible & impact resistant than PA12, bio-derived | Snap fits, living hinges, parts needing ductility |
| TPU (Elastomer) | Flexible, rubber-like, tear-resistant, high elongation | Gaskets, seals, grips, wearables, flexible prototypes |
| Filled Nylons | PA12/PA11 mixed with glass beads (PA-GF) or carbon fiber (PA-CF) or aluminum (Alumide) | Parts needing higher stiffness, strength, or thermal resistance (GF/CF), metallic appearance (Alumide) |
PA 12 Nylon is the workhorse due to its excellent balance of properties and printability. However, if you need something tougher and more flexible, PA 11 is a great choice. For rubbery applications, TPU is the way to go. And when standard nylon isn’t quite strong or stiff enough, glass or carbon-filled variants offer enhanced mechanical performance.
Why Choose SLS? Key Advantages
Beyond the support-free complexity, SLS brings several compelling benefits to the table:

- Excellent Mechanical Properties: Parts are often strong, durable, and suitable for rigorous functional testing and even end-use applications. They tend to have more isotropic properties (similar strength in all directions) compared to FDM prints.
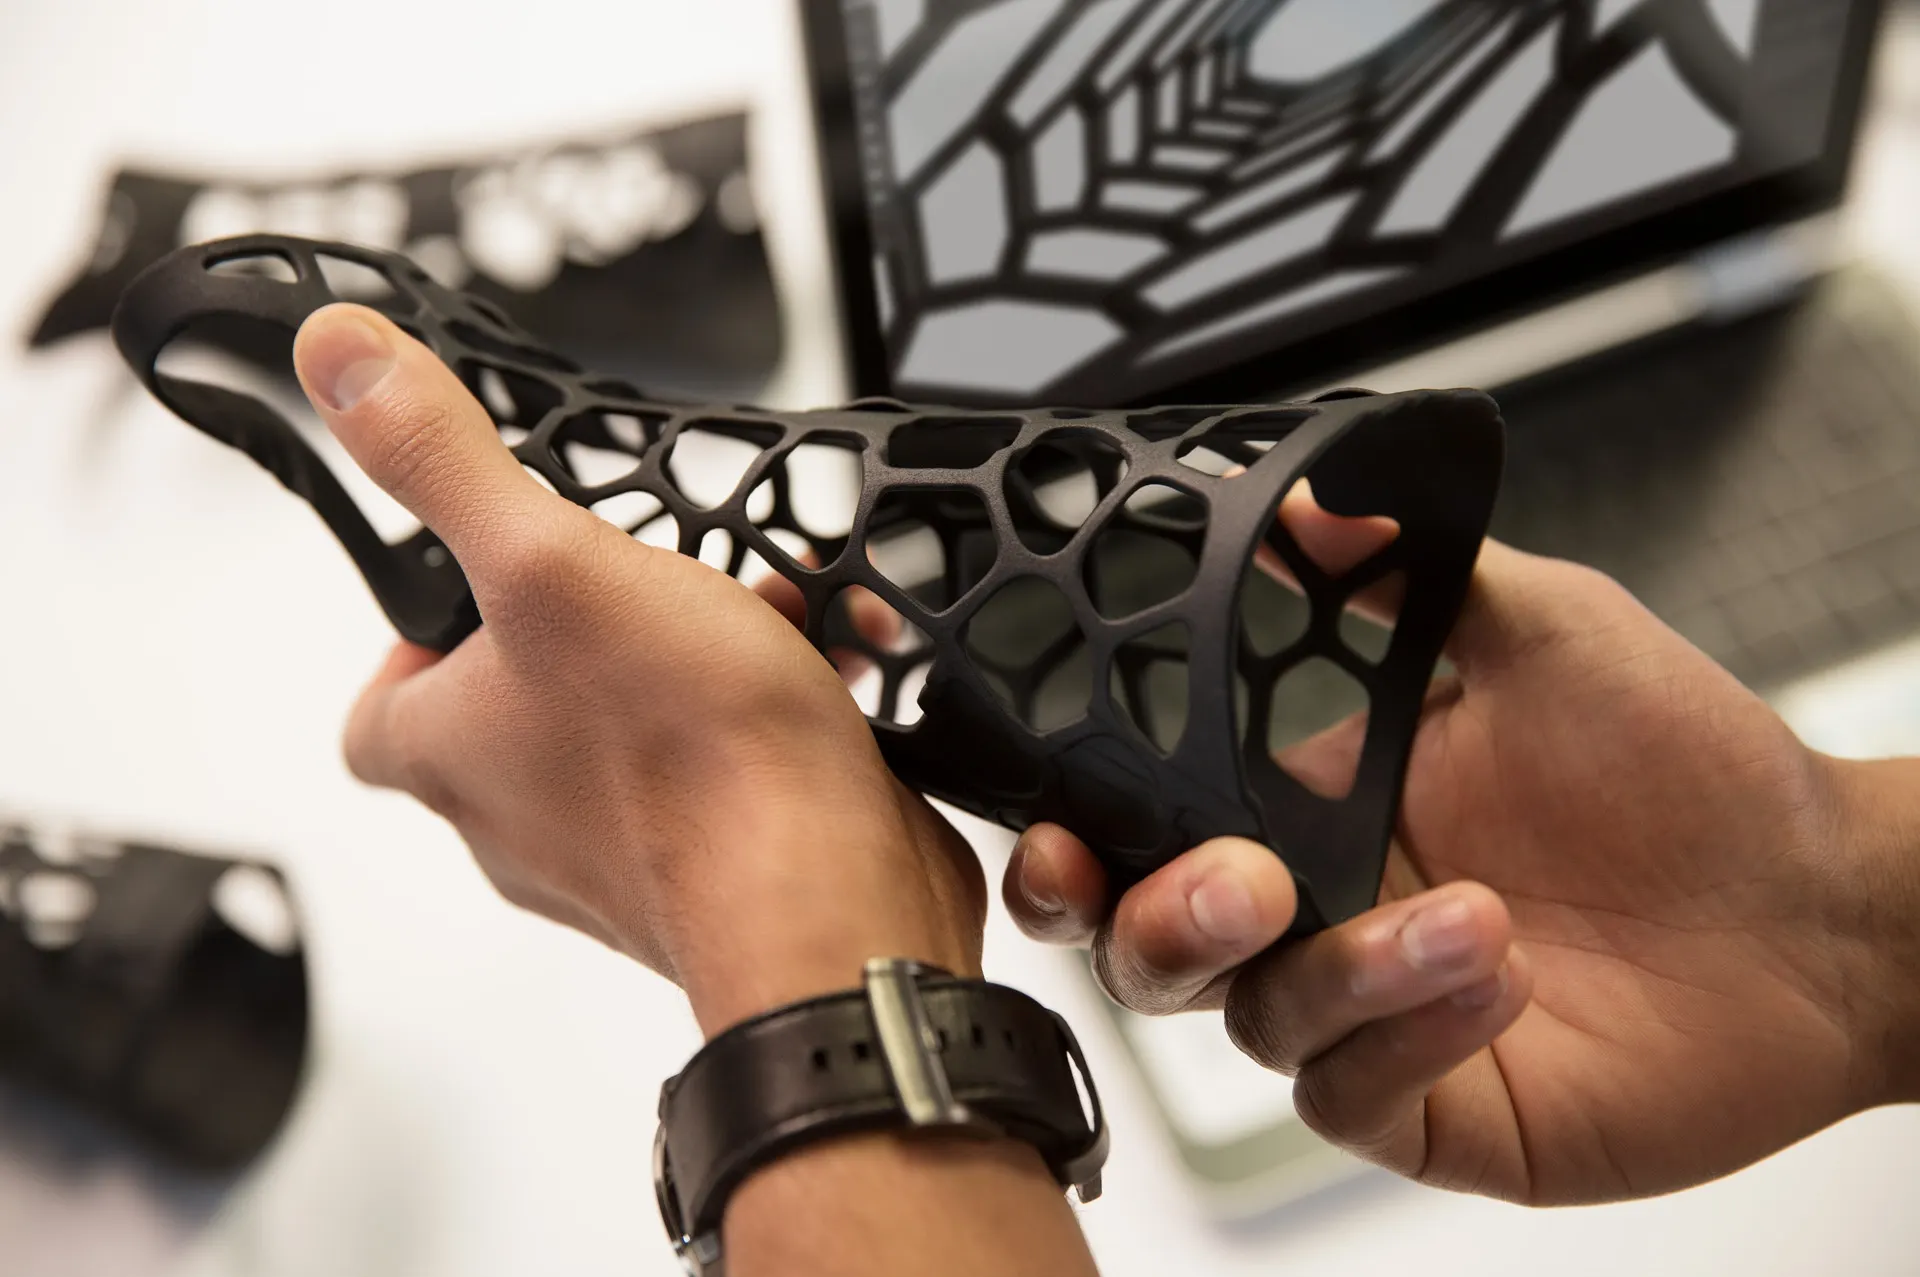
- Design Freedom: As mentioned, the self-supporting nature allows for geometries impossible with other methods – think complex internal channels, interlocking parts printed in place, and organic shapes.
- Batch Processing (Nesting): Because parts support themselves, service providers can pack the entire build volume densely with many different parts from various customers in a single print run. This “nesting” maximizes machine efficiency and throughput. While a packed build takes longer overall, it allows providers to produce many parts simultaneously.
- Good Surface Finish & Detail: While slightly grainy by nature, the finish is generally consistent, and the process can capture fine details effectively. Various post-processing methods (like vapor smoothing) can create injection-mold-like surfaces.
- No Support Removal Scars: Unlike FDM or SLA, there are no pesky marks left behind from removed support structures, leading to cleaner surfaces on all sides.
Where Does SLS Shine? Common Applications
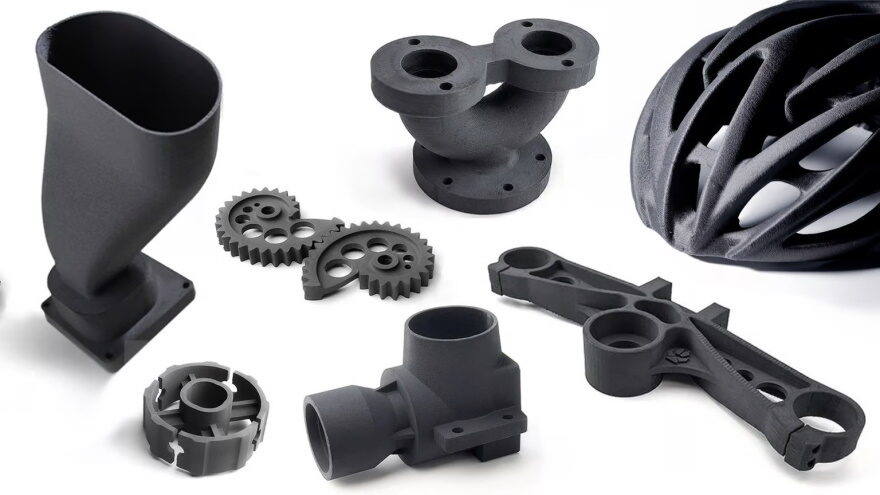
Given its strengths, SLS is heavily utilized across various industries for:
- High-Fidelity Functional Prototypes: Testing form, fit, and function with parts that closely mimic the final product’s mechanical properties.
- Low-to-Mid Volume Production: Creating batches of end-use parts without the high upfront cost of injection molding tooling.
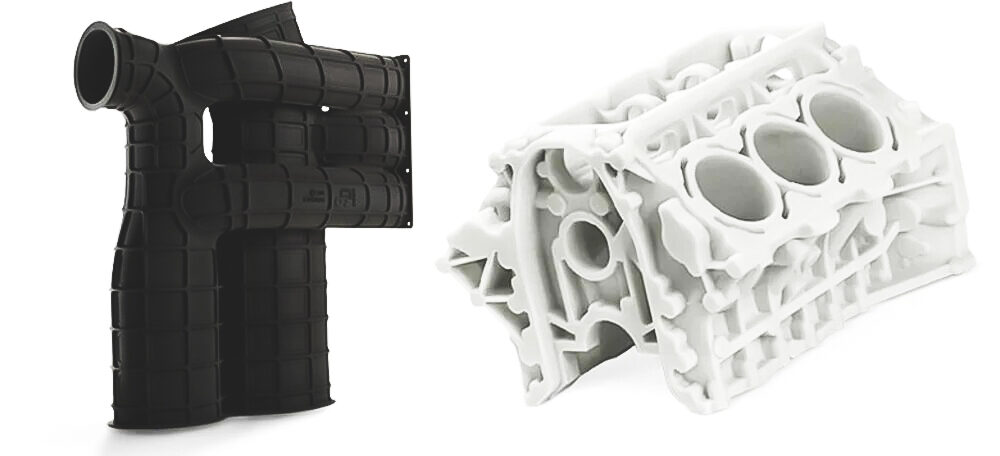
- Complex Ductwork & Housings: Parts with intricate internal features, like air ducts or fluid channels.
- Jigs, Fixtures, and Tooling: Durable custom tools for manufacturing lines.
- Medical Models & Devices: Anatomical models (often from PA11 for biocompatibility), surgical guides, and components for medical equipment.
- Custom Consumer Goods: Personalized items, drone parts, robotics components.
In essence, Selective Laser Sintering is a sophisticated additive manufacturing process renowned for producing strong, complex parts directly from powder. Its ability to self-support designs, utilize robust materials like Nylon, and enable efficient batch production makes it a cornerstone technology for professional prototyping and manufacturing services. Understanding its core principles and advantages is the first step towards leveraging its full potential for your projects.
Beyond the Build Plate: What Does “Turnaround Time” Really Mean for Your 3D Print Order?
So, you’ve uploaded your meticulously designed 3D model to an online SLS printing service, clicked “Order,” and now the waiting game begins. You might think, “Okay, the printer just needs to build it, maybe a day or two?” Hold on a second! If you assume turnaround time simply equals print time, you might be in for a surprise.
Getting your physical part involves a whole sequence of events, a behind-the-scenes journey that starts long before the laser starts sintering powder and ends well after the part is technically “printed.” Understanding this full process is key to setting realistic expectations and planning your project effectively. Think of it like ordering a custom-made suit: it’s not just the time spent stitching; it includes measurements, cutting fabric, fittings, finishing touches, pressing, and packaging.
Let’s break down the typical stages that contribute to the total turnaround time for an SLS 3D printing service:
The Secret Life of Your SLS Part Order: A Stage-by-Stage Breakdown
- Order Placement & Confirmation:
- This is where you upload your file, select material (like PA12 Nylon), choose finishes, specify quantity, and submit your order.
- Time Factor: Usually quick if using an automated online platform, but there might be a short delay while the system processes the order or if manual confirmation is needed.
- File Review & Preparation (The Digital Checkup):
- Crucial Step! Technicians (or sophisticated software) review your submitted file (e.g., STL, 3MF). They check for potential issues like:
- Watertightness/Manifold Errors: Are there holes in your digital model?
- Wall Thickness: Are walls thick enough to print successfully and survive post-processing?
- Printability: Any features that might cause issues during the SLS process?
- They also prepare the file for printing, determining the optimal orientation within the build chamber and nesting it efficiently with other parts if it’s a shared build.
- Time Factor: Can range from minutes (for automated checks on perfect files) to hours or even longer if manual repair or significant re-orientation is needed, or if they need to contact you with questions.
- Crucial Step! Technicians (or sophisticated software) review your submitted file (e.g., STL, 3MF). They check for potential issues like:
- Quoting & Approval (If Applicable):
- Many services offer instant online quotes. However, for very complex parts, large orders, or special requirements, a manual quote might be generated.
- Time Factor: Instant quotes add negligible time. Manual quotes can take hours to a business day, and the clock doesn’t truly start until you approve the quote.
- Job Scheduling & Queuing (Waiting in Line):
- Your order is placed into the production queue. SLS printers often run large, densely packed builds that can take 24-48 hours (or more) to print. Your part needs to wait for an available slot in a build with the correct material.
- Time Factor: This depends heavily on the service provider’s current workload, the number of machines they have, and how efficiently they can nest parts. It could be hours or days.
- Machine Setup & Printing:
- Preparing the machine, loading the correct powder, and initiating the print job. Then, the actual layer-by-layer laser sintering process occurs.
- Time Factor: Print time itself is primarily driven by the height (Z-axis) of the build chamber being used, not just your individual part’s height. A tall build packed with parts will take longer than a short one, regardless of your part size. This can easily be 12-48+ hours.
- Cooling (The Critical Pause – Especially for SLS!):
- This is a MAJOR and often underestimated time component for SLS (and similar powder-bed fusion tech like MJF). After printing, the entire build chamber, filled with the block of sintered parts and unsintered powder (the “cake”), must cool down slowly and controllably.
- Why? Rushing the cooling causes warping and dimensional inaccuracy as different parts of the powder cake cool at different rates.
- Time Factor: Cooling often takes as long as, or even longer than, the print itself! Expect 12-48 hours (or more for very large builds) where the parts are simply sitting and cooling, either inside the machine or in a separate cooling unit. This step generally cannot be significantly expedited without compromising part quality.
- Breakout & Depowdering (The Excavation):
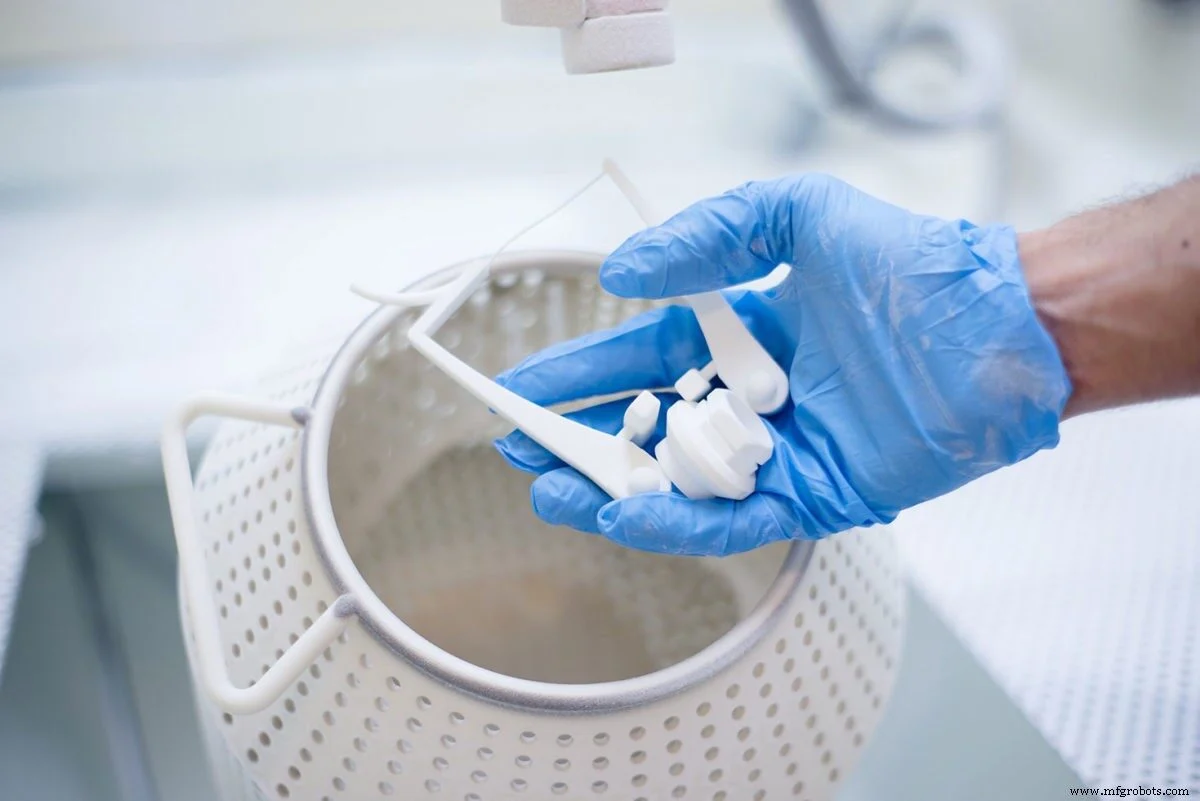
- Once cooled, the build cake is moved to a breakout station. Technicians carefully excavate your parts from the surrounding loose powder.
- The bulk of the loose powder is removed, often manually with brushes and vacuums or using automated systems.
- Time Factor: Can range from relatively quick for simple parts to hours for large batches or complex parts with internal cavities where powder needs meticulous removal.
- Post-Processing & Finishing (The Makeover):
- Parts straight from the powder are typically grainy. Standard finishing usually involves cleaning off residual powder, often via media blasting (like bead blasting) for a uniform, matte finish.
- Additional Steps = Additional Time:
- Dyeing: Adds time for the dyeing bath, rinsing, and drying.
- Vapor Smoothing: Adds significant time for the chemical smoothing process, handling, and curing/drying.
- Painting, Coating, Inserts: Each adds process and handling time.
- Time Factor: Standard bead blasting might take hours within a batch workflow. Dyeing or smoothing can easily add 1-2+ business days each.
- Quality Control (QC) / Inspection:
- Parts are inspected to ensure they meet order specifications and quality standards (dimensional checks, visual inspection).
- Time Factor: Usually integrated into the workflow, but adds a necessary time component, especially for critical tolerance parts.
- Packing & Shipping:
- Parts are carefully packaged to prevent damage during transit.
- The package is handed off to the courier (e.g., UPS, FedEx, DHL).
- Time Factor: Packing itself might take minutes to hours depending on order size. The shipping time itself (e.g., Ground vs. Next Day Air) is chosen by you during ordering and is technically separate from the service’s production turnaround time, but crucial for your overall delivery date. Always clarify if a quoted turnaround time includes shipping or is “ready-to-ship”.
Standard vs. Expedited: Paying for Priority
Many services offer different tiers:
- Standard Turnaround: Follows the normal workflow and queue. This is the most cost-effective option, with typical lead times advertised by the provider (e.g., 3-7 business days before shipping).
- Expedited/Rush Turnaround: Your order gets priority placement in the queue, potentially faster post-processing handling, and sometimes uses faster (though perhaps less densely packed) builds if capacity allows. This comes at a significant cost premium. Even rush orders are still subject to the necessary print and critical cooling times. A rush order might shave off queuing and some handling time but can’t magically eliminate hours of printing or cooling.
When a service quotes “turnaround time,” they are referring to the total duration from order confirmation (and file acceptance) to the point where your parts are ready for shipment. It includes file prep, queuing, printing, the non-negotiable cooling period, breakout, standard finishing, QC, and packing. Optional complex finishing and the actual shipping transit time add further days. Understanding this complete picture is essential for planning accurately and choosing the right service level for your needs.
The Million-Dollar Question: What Are Typical SLS Turnaround Times?
Alright, let’s get down to brass tacks. You understand what goes into the turnaround time (Section III!), but what you really want to know is: how many days should I actually budget for my SLS parts to be ready? If you’re hoping for a single, simple answer… well, the world of custom manufacturing isn’t quite that neat!
Think of it like asking “How long does it take to build a house?” The answer, frustratingly, is “It depends!” Is it a tiny prefabricated cabin or a sprawling custom mansion? The same principle applies here. The time it takes to get your SLS parts depends heavily on numerous factors we’ll explore in the next section.
However, we can provide some general industry estimates to give you a ballpark idea. These are based on what many reputable SLS service providers typically aim for under normal conditions.
Crucial Caveat: These are ESTIMATES ONLY! Your mileage will vary based on your part’s specifics, the service provider’s current workload, the finishes you choose, and more. Always get a specific quote with an estimated completion date directly from your chosen provider for your specific order.
With that important disclaimer out of the way, here are some typical ranges you might encounter:
Estimated Turnaround Time Ranges (Order Acceptance to Ready-to-Ship)
| Service Level | Typical Estimated Range (Business Days) | Key Characteristics | Best For |
| Standard Service | **~ 3 to 7 Business Days** | Balances cost and speed. Follows the normal production queue and workflow. | Most prototyping, non-urgent functional parts, projects with some buffer |
| Expedited / Rush Service | **~ 1 to 3 Business Days** | Prioritized queuing, potentially faster handling. Significant cost premium. | Critical deadlines, urgent prototypes, situations where speed trumps cost |
| Economy / Extended | **~ 8+ Business Days** | Offered by some providers. Lower cost in exchange for lower priority / longer wait. | Non-critical parts, budget-sensitive projects, stocking inventory |
Important Considerations About These Ranges:
- “Business Days”: This usually excludes weekends and holidays. A 5-business-day turnaround ordered on a Monday might be ready the following Monday.
- “Ready-to-Ship”: This is the critical point. These estimates typically represent the time it takes the service provider to produce and package your parts. They do not include the actual shipping transit time to get the package from their facility to your doorstep. You need to add shipping time (which could be 1 day for express or 5+ days for ground) on top of this production turnaround.
- Complexity Matters: These ranges assume parts of average complexity and standard finishing (e.g., bead blast). Very large parts, highly complex geometries requiring extensive cleaning, or parts needing complex finishing like dyeing or vapor smoothing will likely extend these times, even for expedited orders.
- Provider Variation: Some providers are simply faster than others due to scale, automation, or efficiency. Some smaller shops might offer personalized attention but have longer queues. Some large providers might have fast standard times but less flexibility.
- The Unspoken Factor: Cooling: Remember from our previous discussion? The mandatory cooling time for the SLS build (often 24-48 hours) is baked into these estimates and is largely inflexible, especially impacting the minimum possible time for rush orders. You generally can’t get true SLS parts “next day” from the moment you order unless the part is tiny and happens to fit into a build that’s just starting and finishing very quickly.
Setting Realistic Expectations
So, what’s the takeaway? While you might see enticing headlines like “Parts in 24 hours!”, for standard SLS service, it’s wise to plan for at least 3-5 business days of production time plus your chosen shipping speed. If you need parts faster, be prepared to pay a premium for expedited service, but understand even that has limits dictated by the physics of the printing and cooling process.
The absolute best approach? Engage with potential service providers early. Use their online quoting tools, which often provide dynamic lead time estimates based on your specific part and their current load. If the timeline is critical, communicate directly with their support or sales team before placing your order to confirm feasibility.
Decoding the Factors That Dictate Your SLS Turnaround Time
You’ve got your estimated turnaround time, but why isn’t it instantaneous? Why does one order take three days while another takes seven? The answer lies in a complex interplay of factors, stretching from the digital realm of your 3D model all the way to the physical logistics of shipping. Understanding these elements empowers you to plan better and potentially even streamline your own process.
Let’s dissect the journey of your SLS part and pinpoint exactly where time is spent – and sometimes, saved.
A. The Digital Gauntlet: Pre-Processing & Preparation
Before a single grain of powder is touched, your order goes through crucial digital checks and preparation. Delays here can ripple through the entire timeline.
- File Quality & Complexity:
- The Ideal: You submit a perfect, watertight (manifold) STL or 3MF file meeting the provider’s minimum wall thickness requirements. Automated checks pass instantly.
- The Reality: Files often have hidden issues – tiny holes, intersecting faces, walls that are too thin. These require manual review and potentially repair by a technician. Complex internal geometries might also need closer scrutiny to ensure they can be adequately cleaned later.
- Time Impact: A clean file sails through. A problematic file can mean hours or even a day’s delay while the service provider fixes it or contacts you for clarification or a revised file. Pro Tip: Use software tools to check and repair your models before uploading!
- Quoting Process:
- Instant Online Quotes: Most services use automated systems that analyze geometry, calculate volume, and provide instant price and lead time estimates. This is very fast.
- Manual Quotes: For exceptionally large parts, massive quantities, non-standard requests, or if the automated system flags an issue, a human needs to step in.
- Time Impact: Instant quotes add negligible time. Manual quotes can take several hours to a full business day to generate. The clock often doesn’t really start until you formally approve this manual quote.
- Order Volume & Production Queue:
- The Big Picture: Your order doesn’t exist in a vacuum. It joins a queue alongside potentially hundreds of other orders at the service provider. SLS printers run large batches (builds) to be efficient.
- Finding a Slot: Your parts need to be scheduled into an upcoming build using the specific material you selected (e.g., PA12). If the PA12 machines are already running long builds, or if the queue for that material is long, you wait.
- Time Impact: This is highly variable! It depends entirely on the provider’s current workload. During peak times, queue waits can add 1-3 days or more to the standard turnaround. Expedited services essentially pay to jump this queue.
B. In the Hot Seat: The Printing Process Itself
Once your file is prepped and scheduled, it’s time for the laser magic.
- Part Size & Total Build Volume:
- Individual Part Size: While SLS is efficient, very large parts naturally consume more space and may influence nesting slightly.
- Total Volume of Your Order: If you order many copies of a part, or several different large parts, the total volume impacts how much space you take up in one or potentially multiple builds.
- Time Impact: Larger individual parts or higher quantities generally correlate with longer occupancy within the build chamber, but the primary print time driver is…
- Build Height (Z-Axis): The Real Time Hog:
- Layer by Layer: SLS printers build vertically. The laser scans, the platform lowers, a new powder layer is added, repeat.
- The Deciding Factor: The total height of the packed build chamber dictates the print duration more than anything else. Whether it contains one tall part or dozens of small, nested parts, reaching that top layer takes time.
- Time Impact: SLS builds commonly run for 12 to 48 hours, sometimes even longer, depending on the Z-height of the nested parts. Your part’s print time is essentially the time it takes for the entire build it’s nested in to complete.
- Nesting Density & Efficiency:
- Packing it In: Service providers aim to pack the build volume as densely as possible with parts from multiple customers (nesting). This maximizes machine utilization and cost-effectiveness.
- Time Impact (Indirect): Efficient nesting means the provider gets more parts out per build cycle. While a densely packed, tall build takes longer to print and cool than a sparse, short one, it improves overall throughput for the service. It doesn’t necessarily speed up your part if it’s in that long build, but it keeps the service running efficiently.
- Machine Availability:
- Finite Resources: Service providers have a limited number of SLS machines. If demand is high or a machine is down for maintenance, availability becomes a bottleneck.
- Time Impact: Directly affects the queuing time (Factor A3). Fewer available machines mean longer waits for your parts to start printing.
- Material Choice:
- Subtle Differences: While most common materials (PA12, PA11) have relatively similar print parameters, some specialized materials (like TPUs or highly filled powders) might require slightly different settings, dedicated machine setups, or run less frequently.
- Time Impact: Usually minor for standard materials. Choosing a less common material might mean waiting longer for a build specifically using that powder, potentially adding a day or more to the queue time.
C. The Cool Down & Clean Up: Post-Processing (The Hidden Time Sink!)
The printing might be done, but your parts are far from ready! Post-processing is often where significant time is spent.
- COOLING TIME: The Non-Negotiable Wait
- Pay Attention Here! This is arguably the most critical and least flexible time component unique to powder bed fusion technologies like SLS.
- The Science: The entire block of sintered parts and unsintered powder (the “cake”) is extremely hot after printing. It must cool down slowly and uniformly to prevent warping, shrinkage, and internal stresses compromising dimensional accuracy and mechanical properties.
- No Shortcuts: This cooling happens either within the machine itself (occupying it) or by moving the entire build box to a separate cooling station. Trying to rush this WILL result in bad parts.
- Time Impact: Easily 12 to 48 HOURS, often matching or exceeding the actual print time. This period is largely fixed based on the build size and material properties. Expedited orders cannot bypass physics! They still require adequate cooling.
- Breakout & Depowdering:
- The Dig: Parts are carefully extracted from the cooled powder cake.
- Powder Removal: Loose powder is removed using brushes, vacuums, and compressed air. Complex parts with internal channels or fine features require more meticulous (and thus slower) cleaning.
- Time Impact: Ranges from minutes per part to several hours for a large batch or intricate geometries.
- Cleaning / Media Blasting:
- Standard Finish: Most SLS parts undergo media blasting (e.g., bead blasting) to remove any final residual powder and achieve a uniform, matte surface finish. This is the baseline finish.
- Time Impact: Efficient for batches, but still adds several hours to the workflow for handling, blasting, and moving parts to the next stage.
- Required Finishing & Secondary Processes:
- Beyond the Basics: Anything more than the standard blast finish adds time.
- Dyeing: Requires preparing the dye bath, immersing parts, rinsing, and drying. Time Impact: Adds at least 1 business day.
- Vapor Smoothing: Involves chemical vapor exposure, careful handling, and potentially curing/drying time. Time Impact: Can add 1-3+ business days depending on the process and part geometry.
- Painting, Coatings, Metal Plating, Installing Inserts, Assembly: Each secondary process adds its own setup, application, curing/drying, and handling time. Time Impact: Varies greatly, adds days.
- Part Complexity for Post-Processing:
- Hidden Challenges: As mentioned, intricate internal channels, deep pockets, or very fragile features make depowdering and cleaning much more time-consuming and delicate.
- Time Impact: Can significantly increase the time spent in the breakout and cleaning stages.
D. The Final Stretch: Logistics & Service Provider Operations
Even with parts printed and finished, operational factors play a role.
- Provider’s Capacity, Scale & Workflow:
- Infrastructure: Larger providers with more machines, automated systems (like powder handling and sorting), and dedicated post-processing lines can often handle higher volumes more efficiently.
- Workflow: Streamlined internal processes vs. disjointed steps make a difference.
- Time Impact: Affects queuing times and overall processing speed. A highly optimized facility might offer faster standard times.
- Operating Hours:
- 24/7 vs. 9-to-5: Do they run machines and post-processing overnight and on weekends? A facility running 24/7 can potentially move parts through cooling and initial post-processing steps faster than one operating only during standard business hours.
- Time Impact: Can influence how quickly parts transition between stages, especially over weekends or holidays.
- Quality Control (QC) Procedures:
- Essential Check: Inspections for dimensional accuracy, visual defects, and adherence to order specs are vital but take time. Complex parts or those with tight tolerances require more thorough inspection.
- Time Impact: Usually a relatively small but necessary part of the overall workflow, potentially adding a few hours.
- Packing & Shipping:
- Preparation: Orders need to be sorted, checked against the order, carefully packaged.
- Shipping Method Chosen: This is technically after the production turnaround but critical for delivery. Ground shipping adds multiple days compared to overnight express.
- Time Impact: Packing adds minimal time. Shipping transit time is determined by your selection and the carrier, adding 1-5+ days.
- Geographic Location:
- Distance Matters: The physical distance between the service provider and your location directly impacts the shipping transit time.
- Time Impact: Affects the final delivery date after the production turnaround is complete.
As you can see, the journey from file upload to part-in-hand is a marathon, not a sprint, with numerous checkpoints where time is invested. From file checks and queue waits, through printing and the essential cooling period, to meticulous cleaning and finishing, capped off by logistics – every step contributes to the final turnaround time. Understanding these factors helps you appreciate the process and plan your projects more effectively.
Taking the Wheel: How You Can Help Optimize Your SLS Turnaround Time
Waiting for custom parts can feel like watching paint dry, especially when deadlines loom large. While many factors dictating SLS turnaround time – like the provider’s queue, the laws of physics governing cooling, and the actual print speed – are largely out of your direct control, don’t despair! There are absolutely things you can do during the design, preparation, and ordering process to help streamline the workflow and potentially get your parts faster.
Think of it as clearing the runway before the plane takes off. By ensuring everything on your end is optimized, you minimize friction points and help the service provider move your order through their system as efficiently as possible. Let’s explore how you can become an active participant in speeding up your delivery:
- Smart Design Decisions: Building for Speed (and Success)
Your design choices have a direct impact not just on the part’s function, but also on how easily and quickly it can be manufactured and processed.
- Simplify Where Possible (Without Sacrificing Function): SLS excels at complexity, but unnecessary complexity can sometimes slow things down, particularly in post-processing (cleaning intricate channels, handling delicate features). If a simpler geometry achieves the same functional goal, it might move through cleaning and QC slightly faster.
- Nail the Wall Thickness: This is a HUGE one for avoiding initial delays. Service providers have minimum printable wall thickness requirements (often around 0.8mm – 1mm for SLS). Designing below this threshold guarantees your file will be flagged during the initial check, causing delays while they contact you for revisions. Always design to meet or exceed the provider’s recommended minimums.
- Consider Hollowing (Carefully!): Hollowing out thick, solid sections of your model can:
- Reduce the volume of sintered material, potentially decreasing print time slightly (though build height is still dominant).
- Lower material cost.
- BUT: You must include escape holes (at least 2, strategically placed) so the internal unsintered powder can be removed during breakout and cleaning. If powder gets trapped, the part may be heavier than expected or unusable. Designing effective escape holes and the subsequent cleaning of hollow parts can sometimes add complexity back into the post-processing stage. Weigh the pros and cons for your specific application.
- Flawless Files & Clear Instructions: Avoiding Digital Roadblocks
The initial file submission and order definition stage is a prime area where you can prevent unforced errors and delays.
- Submit Print-Ready Files: Don’t just export and upload. Take a few minutes to ensure your file is optimized:
- Format: Use standard, widely accepted formats like STL (binary is usually preferred over ASCII) or 3MF.
- Watertight/Manifold: This is critical. Your 3D model must be a completely enclosed volume with no holes, gaps, or self-intersecting surfaces. Think of it like a digital balloon – any holes mean it’s broken.
- Pre-Submission Check: Use software (like Meshmixer, Netfabb, or built-in tools in your CAD software) to analyze and repair your mesh before you upload it. Fixing errors yourself is much faster than waiting for the service provider to do it (or ask you to).
- Provide Crystal-Clear Instructions: Leave no room for ambiguity. When placing your order:
- Clearly select the exact material (e.g., PA 12, PA 11-GF).
- Specify the desired finish (e.g., Standard Bead Blast, Dyed Black, Vapor Smoothed).
- Double-check the quantity.
- If certain features or tolerances are critical, clearly note them in the comments or by uploading a technical drawing alongside your 3D file. This helps the provider during orientation, nesting, and QC.
- Strategic Material & Finish Choices: Understanding Time Implications
Your choices here directly translate into time spent in production.
- Stick to Standard Materials (Usually Faster): Service providers run builds with common materials like PA12 Nylon far more frequently than niche materials. Choosing a standard material increases the chances your part can be quickly nested into an upcoming build. Opting for a less common material might mean waiting longer for enough orders to justify starting a build with that specific powder.
- Embrace the Standard Finish for Speed: The quickest option is almost always the provider’s standard finish (typically a natural white/grey, media-blasted surface). Every additional post-processing step adds predictable time:
- Dyeing: Adds time for the dyeing process itself, plus crucial drying time. Factor in at least 1 extra business day.
- Smoothing (e.g., Vapor Smoothing): Requires dedicated process time, handling, and often curing/drying. Factor in 1-3+ extra business days.
- Painting, Coating, etc.: Each adds its own process time.
- The Takeaway: If speed is paramount, carefully consider if advanced finishes are truly necessary for this iteration. You can always order a basic finish first for rapid testing.
- Smart Ordering & Proactive Communication: Smoothing the Logistics
How and when you order, and how you interact with the provider, also matters.
- Order Early, Order Often (Well, Early Anyway): This sounds obvious, but the best way to mitigate deadline stress is to build buffer time into your schedule. Don’t wait until the last possible moment.
- Leverage Online Quoting Tools: These automated systems are designed for speed. They often provide instant feedback on file printability and give you immediate price and estimated lead time, streamlining the initial steps.
- Communicate Critical Deadlines UPFRONT: If you have a hard deadline, don’t just select “Expedited” and hope for the best. Contact the service provider’s support or sales team before placing the order. Discuss your deadline, part complexity, and desired finish to get a realistic assessment of whether they can meet it.
- Be Responsive: If the service provider contacts you with a question about your file or order (e.g., a thin wall warning, ambiguity in instructions), respond as quickly as possible. Every hour you delay your response is an hour your order sits idle instead of moving forward in the production queue.
- Choose Your Service Level Wisely: Balancing Speed and Cost
- Standard vs. Expedited: Understand the trade-off. Expedited service prioritizes your order in the queue and potentially in handling, significantly reducing wait times. However, it comes at a substantial cost increase.
- Manage Expedited Expectations: Remember, “expedited” doesn’t defy physics. It mainly bypasses queuing delays. The core print time and, critically, the unavoidable cooling time, still apply. Don’t expect miracles, but it can shave off valuable days compared to standard service.
While you can’t personally oversee every step of the SLS process, optimizing everything within your control – from designing robust, print-ready models to communicating clearly and choosing appropriate finishes – can significantly reduce friction and potential delays. By being a proactive and informed customer, you play a vital role in helping your SLS service provider deliver your parts as efficiently as possible.
Choosing Your Speed Partner: Selecting an SLS Provider Based on Turnaround Time
You’ve designed your part, optimized your file, and you understand the factors influencing speed. Now comes a critical decision: which SLS 3D printing service provider should you trust with your project, especially when time is of the essence?
Choosing a provider isn’t just about finding the lowest price or the widest material selection. When deadlines matter, their ability to deliver reliably and predictably within a reasonable timeframe becomes paramount. Not all services are created equal in this regard. Some are models of efficiency and transparency, while others might leave you guessing.
So, how do you evaluate potential SLS partners through the specific lens of turnaround time? Here’s what to look for and what questions to ask:
- Transparency is King: Look for Clear Lead Time Information
This is non-negotiable. A reputable provider should be upfront about how long things typically take.
- Clearly Stated Estimates: Does their website or quoting tool provide explicit estimated lead times for different materials and finishes? Vague promises like “fast turnaround” aren’t helpful. Look for specific day ranges (e.g., “Standard: 3-5 business days,” “Expedited: 1-2 business days”).
- Dynamic Quoting: The best online quoting tools often provide dynamic lead time estimates that update based on your chosen material, finish, quantity, and sometimes even their current known capacity. This is far more valuable than a static estimate.
- “Ready-to-Ship” vs. “Delivered By”: Pay close attention to what the quoted time represents. Does it mean when the part leaves their facility (“ready-to-ship” or “ex-works”), or does it include shipping time (“delivered by”)? This distinction is crucial for your planning. Most professional services quote “ready-to-ship” time.
- Efficiency of the Quoting System
How easy is it to even get a time estimate?
- Instant Online Quotes: Services offering instant quotes (price and estimated lead time) upon file upload are generally more streamlined. It shows investment in automation and provides immediate feedback.
- Manual Quote Turnaround: If a manual quote is required (for complex parts, etc.), how long does that process take? A provider taking days just to give you a quote might signal slower internal processes overall.
- Understand Their Service Levels
Most providers offer different speeds at different costs. Evaluate these options:
- Clear Definitions: Are the distinctions between Standard, Expedited (Rush), and potentially Economy tiers clearly defined in terms of expected time savings?
- Cost vs. Speed: Is the cost premium for expedited service clearly listed? Make sure the time saved justifies the extra expense for your project. Remember, expedited service mainly cuts queue time, not the essential print/cool time.
- Communication: Can You Get Answers?
When time is tight, good communication is vital.
- Responsiveness: How easy is it to contact their customer support or sales team? Send a test inquiry asking about lead times for a hypothetical complex part or finish. How quickly and thoroughly do they respond?
- Proactive Updates: Do they offer order tracking or proactive updates if unforeseen delays occur? Knowing about a delay early is better than being surprised on the expected delivery day.
- Dig into the Track Record: Reviews & Reputation
Past performance is often the best indicator of future results.
- Read Customer Reviews: Look beyond just star ratings. Search for reviews specifically mentioning delivery speed, meeting deadlines, and communication regarding timelines. Are delays a common complaint, or do customers praise their reliability? Look for patterns across multiple review platforms (Google, dedicated manufacturing forums, etc.).
- Ask Peers: If you’re in a professional network, ask colleagues about their experiences with different SLS service providers regarding on-time delivery.
- Check the Fine Print: Policies & Terms
It’s not exciting reading, but the Terms of Service can sometimes contain relevant information.
- Lead Time Policies: Do they have any stated policies regarding lead times? Do they mention potential reasons for delays (e.g., machine maintenance, file issues)?
- Guarantees (Rare but Valuable): While uncommon for custom manufacturing, some providers might offer limited guarantees or compensation if they miss an expedited deadline significantly (though usually with many caveats).
- Consider Their Scale and Infrastructure (Indirect Clues)
While not always directly advertised, you can sometimes infer a provider’s capacity.
- Range of Services: A provider with many machines, a wide range of materials, and sophisticated post-processing options likely has a larger, potentially more robust operation capable of handling higher volumes, which could translate to faster standard times or better expedited capacity.
- Automation: Providers highlighting investments in automation (automated powder handling, finishing systems) may have more streamlined workflows.
- Location, Location, Location (and Shipping)
Production time is only part of the equation; transit time matters too.
- Geographic Proximity: If you need parts very quickly, choosing a provider located geographically closer can significantly cut down on shipping time and cost, especially if using ground shipping.
- Shipping Options Offered: Do they partner with reliable carriers (FedEx, UPS, DHL)? Do they offer a range of shipping speeds (Ground, 2-Day, Overnight)? Ensure their options align with your needs and budget.
Red Flags to Watch For:
- Overly Optimistic Promises: Be wary of providers promising consistent “next day” or “24-hour” turnaround for anything beyond tiny, simple parts with basic finishes. This often ignores the realities of SLS cooling times.
- Lack of Transparency: Difficulty finding any information about typical lead times before ordering.
- Poor Communication: Unresponsive customer service or vague answers to timeline questions.
- Negative Review Patterns: Consistent complaints online about missed deadlines and poor communication regarding delays.
Choosing the right SLS service provider is a balancing act between cost, quality, materials, and, crucially, speed. By specifically evaluating potential partners on their transparency, communication, track record, and service options related to turnaround time before you place your order, you significantly increase your chances of getting the parts you need, when you need them. Do your homework – it pays off when the clock is ticking.
Speed Check: How Does SLS Turnaround Compare to Other 3D Printing Methods?
You’ve zeroed in on SLS for its strength and complexity, but maybe you’re wondering: could another 3D printing technology get me parts faster? It’s a valid question, especially when deadlines are tight. While Selective Laser Sintering (SLS) offers fantastic benefits, its turnaround time has unique characteristics compared to other popular methods like FDM, SLA, and its close relative, MJF.
Understanding these differences helps you choose the right tool for the job, balancing speed, cost, material properties, and part requirements. Let’s put SLS head-to-head with the competition, focusing specifically on the factors that influence how quickly you get parts in hand.
First, a quick recap of SLS Time Factors: Remember, SLS turnaround involves queuing, printing (driven by build height), a critical and lengthy cooling period (often 12-48 hours), breakout/depowdering, and standard finishing (like bead blasting). Optional extras like dyeing or smoothing add more time.
Now, let’s see how others stack up:
SLS vs. FDM (Fused Deposition Modeling / FFF)
- The Technology: This is the most common type, especially for desktop printers. It works by extruding a melted filament (like PLA, ABS, PETG) layer by layer.
- Print Speed: For a single, relatively simple part, FDM can often print faster than a typical SLS build cycle start-to-finish, especially on a dedicated desktop machine. However, printing very complex parts with lots of support structures, or very tall parts, can become quite slow. Service bureaus running FDM often batch parts, similar to SLS, but build times depend heavily on individual part complexity and support needs.
- Cooling: Minimal cooling time is required compared to SLS. Parts are generally stable shortly after the print finishes.
- Post-Processing: This is where FDM can get bogged down.
- Support Removal: Most complex FDM parts require support structures that need to be manually broken or cut away, leaving potential marks or rough spots (support scars). Dissolvable supports exist but require extra time and equipment (a solvent bath).
- Surface Finishing: Layer lines are typically very visible. Smoothing (sanding, painting) is often required for aesthetic or functional reasons, adding manual labor time.
- Overall Turnaround:
- Desktop FDM: For quick, simple prototypes you print yourself, FDM can be the fastest if you own the printer.
- FDM Service Bureaus: Logistics (queuing, setup, shipping) add similar overhead as SLS services. While printing might be faster for some geometries and there’s no long cooling delay, mandatory support removal and potential finishing needs can add significant time back in.
SLS vs. SLA (Stereolithography) & DLP (Digital Light Processing)
- The Technology: These processes use UV light (laser for SLA, projector for DLP) to cure liquid photopolymer resin layer by layer, creating highly detailed parts.
- Print Speed: Often considered very fast, especially DLP which can cure entire layers simultaneously. Print speed is primarily determined by layer height and the Z-axis height, similar to SLS. Can be faster than SLS for builds of comparable height.
- Cooling: Minimal cooling required after printing.
- Post-Processing:Mandatory and multi-step. This is the key time factor for SLA/DLP:
- Washing: Parts must be thoroughly washed in a solvent (typically isopropyl alcohol or specialized liquids) to remove all uncured, sticky resin from surfaces and internal channels. This can take time and require specific equipment.
- UV Curing: After washing and drying, parts need post-curing in a UV light chamber to fully solidify and achieve optimal mechanical properties. This curing cycle can take anywhere from 30 minutes to several hours depending on the resin and part size.
- Support Removal: Like FDM, SLA often requires fine support structures that need careful removal, potentially leaving small blemishes requiring sanding.
- Overall Turnaround: Print times can be quick, and there’s no extended cooling like SLS. However, the mandatory washing and UV curing steps add significant, unavoidable post-processing time. While potentially faster than SLS for certain scenarios (especially smaller, highly detailed parts), the overall turnaround might be closer than print speeds alone suggest due to these required post-print steps.
SLS vs. MJF (Multi Jet Fusion)
- The Technology: Developed by HP, MJF is also a powder bed fusion process, making it SLS’s closest competitor. It uses an inkjet array to selectively apply fusing and detailing agents onto a powder bed, followed by heating elements to fuse the layer.
- Print Speed: MJF print cycles (the time the printer head is actively working) are generally considered very fast, often faster than SLS laser scanning for a given layer.
- Cooling:Identical critical constraint as SLS! Because MJF is also a powder bed fusion process dealing with high temperatures, the entire build unit requires a long, controlled cooling period (often comparable to or slightly optimized vs. SLS, but still in the many hours to days range) to prevent warping and ensure part properties.
- Post-Processing: Very similar workflow to SLS:
- Breakout & Depowdering: Extracting parts from the cooled powder cake.
- Cleaning/Bead Blasting: Standard procedure to remove residual powder.
- Overall Turnaround: Due to the shared powder bed nature and critical cooling time requirement, the overall turnaround times for MJF and SLS are highly comparable. While MJF might have a slight edge in the printing phase itself, the mandatory cooling period and similar post-processing steps mean that from order submission to ready-to-ship, typical lead times (e.g., 3-7 business days for standard) are often in the same ballpark. They compete directly on speed, quality, and cost.
Key Takeaways & Quick Comparison
| Feature | SLS | FDM | SLA/DLP | MJF |
| Primary Time Drivers | Build Height, Cooling, Queue | Part Complexity, Supports, Queue | Build Height, Washing/Curing, Queue | Build Height, Cooling, Queue |
| Mandatory Long Wait Post-Print? | YES (Cooling: 12-48+ hrs) | No | YES (Wash/Cure: hours) | YES (Cooling: 12-48+ hrs) |
| Support Removal? | No (Self-supporting) | Yes (Often significant, leaves marks) | Yes (Often fine, leaves small marks) | No (Self-supporting) |
| Typical Standard Service Turnaround | ~3-7 Business Days | Variable, potentially faster for simple | ~3-7 Business Days | ~3-7 Business Days |
The Bottom Line:
No single technology is universally “fastest.”
- For rapid, simple prototypes on your own desktop, FDM might win if you own the machine.
- For high detail where post-processing (washing/curing) is acceptable, SLA/DLP can be quick.
- For strong, complex, functional parts without support scars, SLS and MJF are top contenders, but you must account for their inherent, lengthy cooling periods in your planning. Their overall professional service turnaround times are often very similar.
Understanding where the time goes in each process allows you to select the technology and service provider that best aligns with your project’s specific deadline, budget, and performance requirements.
Conclusion: Planning for Predictable SLS Part Delivery
Navigating the world of 3D printing services can feel complex, especially when project deadlines are looming. We embarked on this journey to answer a seemingly simple question: How long does it really take to get parts from an SLS 3D printing service? As we’ve discovered, the answer is multifaceted, stretching far beyond just the time the laser is actively sintering powder.
We’ve seen that “turnaround time” is a comprehensive metric, encompassing everything from the moment you click “order” to the moment your parts are packaged and ready for shipment. This includes essential steps like file checks, quoting, production queuing, the actual printing process (driven largely by build height), critical post-print cooling, part breakout and cleaning, finishing touches, and quality control.
The Key Factors Recap:
If there are a few crucial takeaways regarding what drives SLS turnaround times, they are:
- Your Part & Order: Complexity, size, quantity, and file quality all play a role. Clean files and clear instructions prevent initial delays.
- The Unavoidable Cooling Period: This is the big one for SLS (and MJF). The mandatory, slow cooling process (often 12-48 hours) is essential for part quality and cannot be significantly rushed, forming a hard lower limit on how fast parts can truly be produced.
- Finishing Requirements: Standard bead blasting is fastest. Every additional step – dyeing, vapor smoothing, painting – adds predictable time, often measured in days.
- Service Provider Operations: Their current queue/workload, machine availability, and operational efficiency heavily influence how quickly your order moves from accepted to printed.
- Your Choices: Opting for standard materials and finishes, submitting print-ready files, and selecting the appropriate service level (Standard vs. Expedited) gives you a degree of control.
Manage Expectations, Master Planning:
Perhaps the most vital lesson is the need to manage expectations realistically. While SLS technology enables incredible speed in design iteration compared to traditional methods, the physical process has inherent time requirements. Don’t be swayed solely by marketing buzzwords; understand that quality SLS printing, especially that crucial cooling phase, takes time. Build this understanding into your project timelines. Planning for a standard service time of 3-7 business days (plus shipping) is a sensible starting point for many projects. If you need it faster, be prepared for the premium cost of expedited service, but know even that has limits.
The Underrated Power of Communication:
Never underestimate the value of talking to your service provider. If your deadline is critical, reach out before ordering. Discuss your specific needs, part complexity, and required finish. A good provider will offer transparency about their current lead times and help you understand the feasibility of your timeline. Similarly, being responsive if they have questions about your order can prevent unnecessary delays.
Final Thought:
Selective Laser Sintering offers remarkable capabilities for producing strong, complex, functional parts. By understanding the complete journey your part takes – from digital file check and production queue, through printing and that vital cooling phase, to meticulous finishing and final shipment – you can plan more effectively, set realistic deadlines, and ultimately leverage the full power of SLS 3D printing to bring your innovations to life, right when you need them.

